

Bring your relational data to the web
Objective
 This starter guide will explain how to deploy the simplest form of data service using a sample embedded derby database that ships with WSO2WSAS-2.0.
My main intention is to guide you through deploying a simple data service without paying attention to too many configuration details. More advanced features will be discussed in a future article.
Prerequisites
1. Download WSO2WSAS-2.0 from https://dist.wso2.org/products/wsas/java/2.0/
2. Install it as a standalone server. (Install location will be referred to as WSAS_HOME hereafter.)
3. Download and install Ant (version 1.6.5 or higher) from https://ant.apache.org/
4. Start WSO2WSAS-2.0 (run WSAS_HOME/bin/wso2wsas.bat | wso2wsas.sh)
5. Open a web browser and navigate to https://localhost:9443/
6. Login to WSO2WSAS-2.0 (using Username/password = admin/admin)
Step 1 – Creating and populating a sample database
1. In a new command window, go to WSAS_HOME/samples/DataService and type 'ant'.
2. This will produce an output similar to the following.
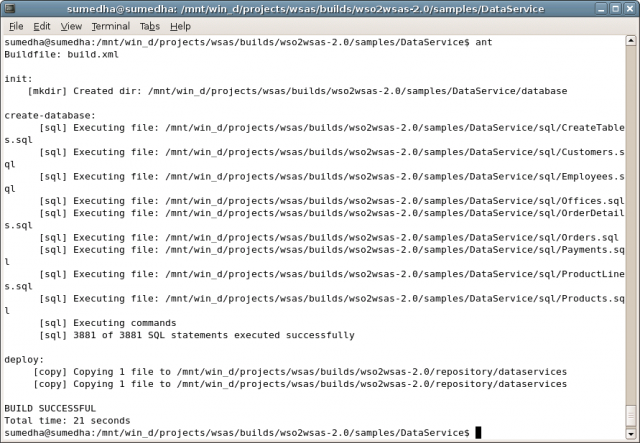
Now you have a sample Derby database created and populated. From the next step onwards, we will be using this database to create our Data Service.
Step 2 – Define a data service screen
In a web browser, click on the 'Services' link (upper left hand corner) and you will see the following screen.
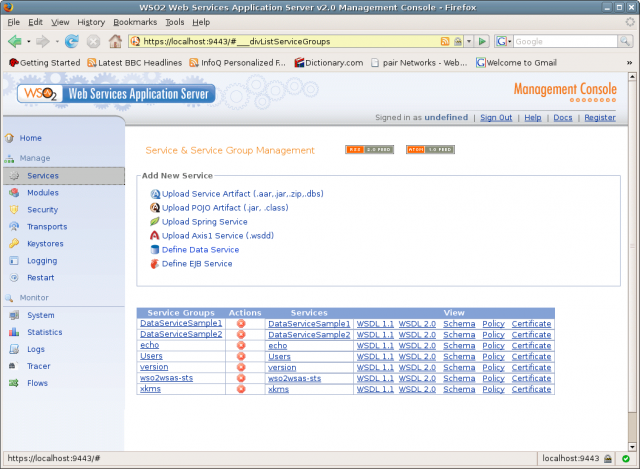
Click on the 'Define Data Service' link.
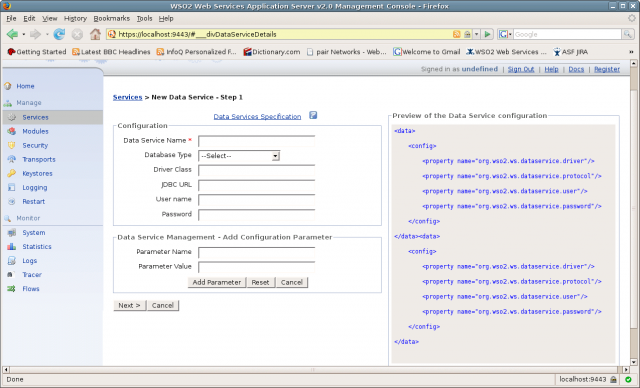
Step 3 – Creating a data service (configuring the connection)
Enter the details on the page using the values in the table below. Click Next.
|
Field name |
Value |
|
Data Service Name |
EmployeeServices |
|
Database Type |
Apache Derby (select) |
|
Driver Class |
org.apache.derby.jdbc.EmbeddedDriver (automatically filled) |
|
JDBC URL |
jdbc:derby:../samples/DataService/database/DATA_SERV_SAMP |
|
Username |
wsas |
|
Password |
wsas |
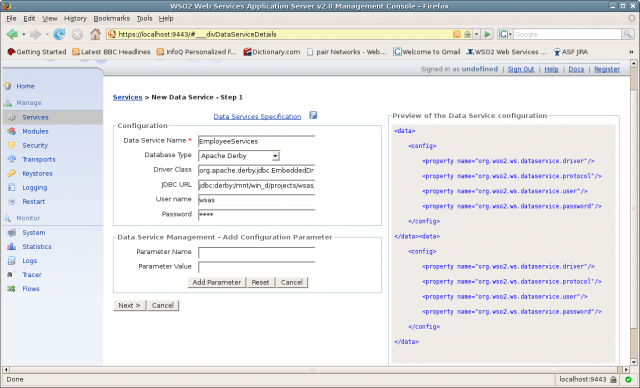
Step 4 – Creating a data service (configuring the SQL query)
Now you will be on this page.
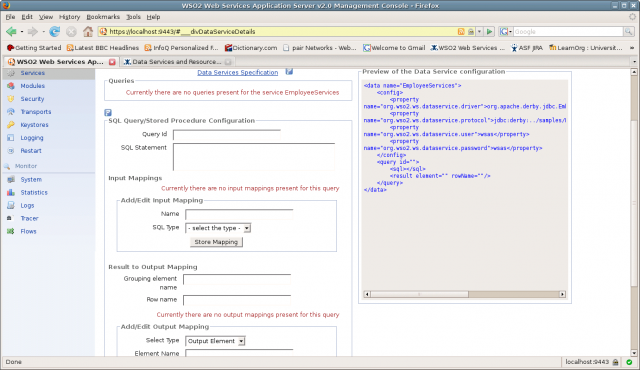
Fill the first part of page using the values given in the following table.
|
Field |
Value |
|
Query ID |
allEmployees |
|
SQL Statement |
select FIRSTNAME, EMAIL from WSO2WSAS.EMPLOYEES |
|
Grouping element name |
Employees |
|
Row name |
Employee |
Adding Result-to-output mapping
Enter the following values to the 'Add/Edit output mapping' section and click Store Mapping.
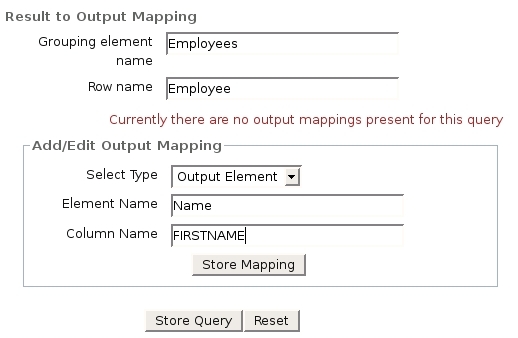
The page will be updated as follows.
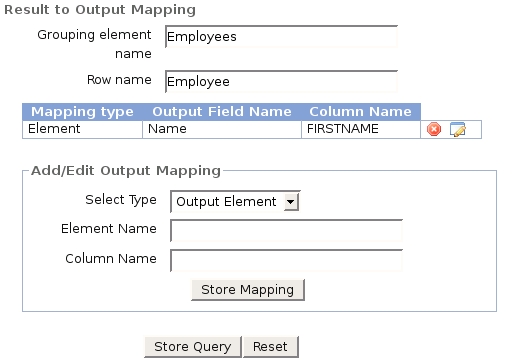
Add another mapping using the following values.
|
Field |
Value |
|
Select Type |
Output Element |
|
Element Name |
|
|
Column Name |
|
Now the page should look like this.
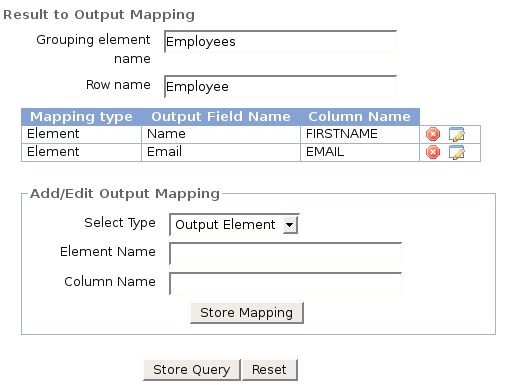
The full page will look like the following.
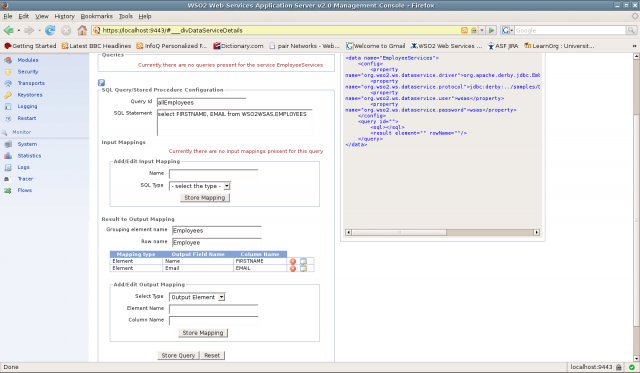
Click Store Query and the query will be saved. Click Next.
Step 4 – Creating a data service (configuring operation)
Your page should now look like the following. The drop down in front of the 'Query' field will list the name of the SQL Query (i.e., allEmployees) that we entered in the previous step.
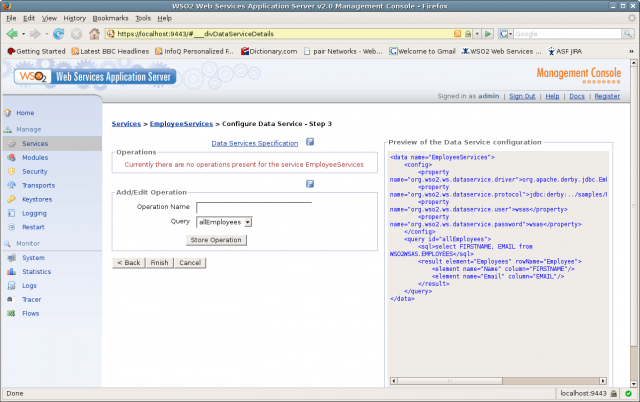
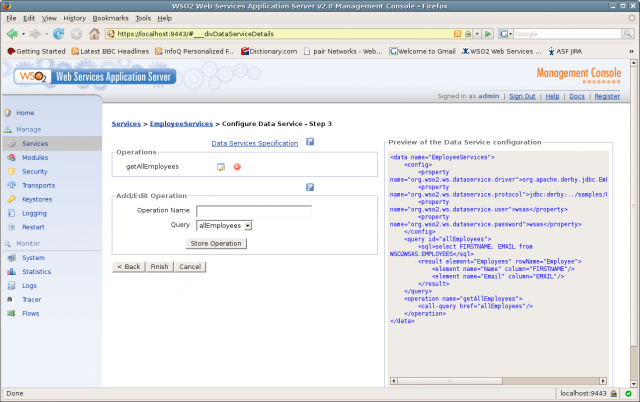
In the 'Operation Name' field, enter the value 'getAllEmployees'. Click Store Operation. Your page should look like this.
Step 5 – Deploying a data service
We are about to deploy our simple data service. Please take a moment to check the content inside the 'Preview of Data Service Configuration' box. It should be equivalent to the following.
<data name="EmployeeServices">
<config>
<property name="org.wso2.ws.dataservice.driver">org.apache.derby.jdbc.EmbeddedDriver</property>
<property name="org.wso2.ws.dataservice.protocol">jdbc:derby:../samples/DataService/database/DATA_SERV_SAMP</property>
<property name="org.wso2.ws.dataservice.user">wsas</property>
<property name="org.wso2.ws.dataservice.password">wsas</property>
</config>
<query id="allEmployees">
<sql>select FIRSTNAME, EMAIL from WS02WSAS.EMPLOYEES</sql>
<result element="Employees" rowName="Employee">
<element name="Name" column="FIRSTNAME" />
<element name="Email" column="EMAIL" />
</result>
</query>
<operation name="getAllEmployees">
<call-query href="allEmployees" />
</operation>
</data>
If your configuration is not matching, chances are that you have made a mistake in one of the above steps. Please start from the beginning. (You can edit the existing configuration. But for brevity of this Starter Guide, I will not go into details of editing. It will be available in the next tutorial).
The content here is explained in Data Service Specification [1]. You will find a link to this under references section.
Deploy the Data Service by clicking Finish.
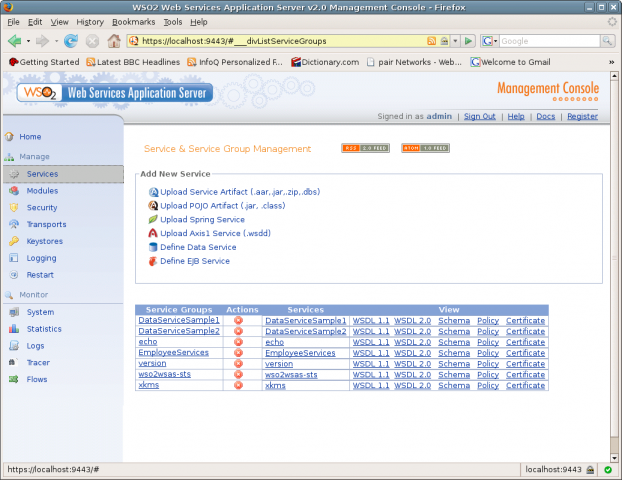
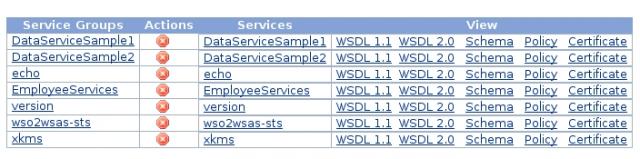
You will be taken to the 'Services' page, and after a while the following service will appear.
Step 6 – Testing the deployed service
Congratulations!!!!. You have deployed a data service running within WSO2WSAS-2.0. Let's call the service and examine the output.
Since a Data Service is similar to any other Web service, you can invoke it the same way as you invoke other web services. To make things easy, let's use the 'Try it' feature in WSO2WSAS-2.0 to invoke the service. Carry out the following steps and you will invoke the service with zero coding!!!.
Click on the 'Service' link for EmployeeServices.
You will be taken to a page similar to the following.
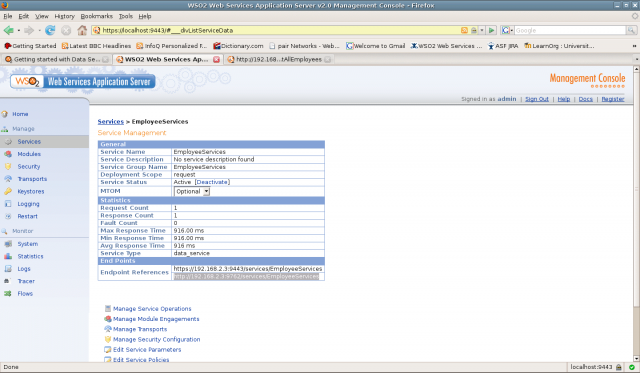
Copy the HTTP endpoint reference (which is 'https://192.168.2.3:9762/services/EmployeeServices' in my case), and append '/getAllEmployees' to the end of it.
Finally, your URL should look as follows:
https://192.168.2.3:9762/services/EmployeeServices/getAllEmployees
'EmployeeServices' is the service name for our data service and 'getAllEmployees' is the operation we created.
Paste the above on the new browser window and press Enter. You will get a result window similar to the following.
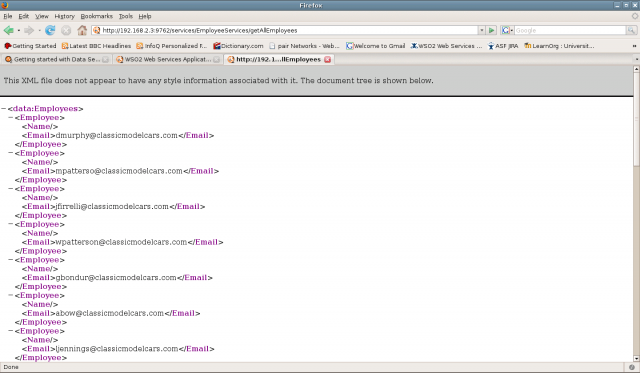
This XML output is generated using data in the database (retrieved against the SQL Query we supplied in step 4). The element names are in sync with the element names we provided under the section 'Result-to-output mapping'.
Step 7 : Another way to test the service
Go to the Service description page for 'EmployeeServices'. Click on 'Try it' link. (Highlighted in the image bellow)
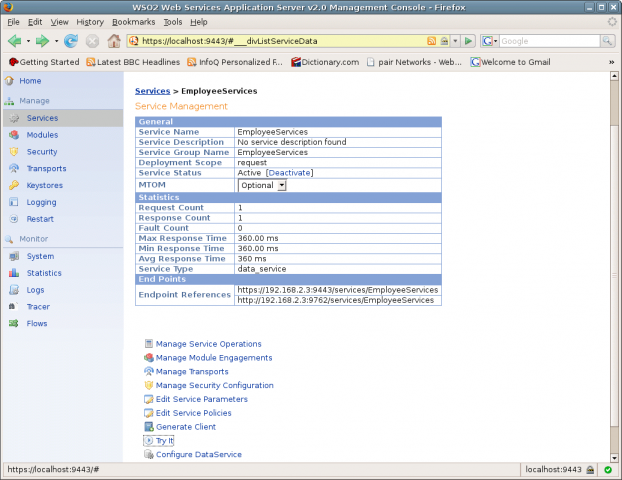
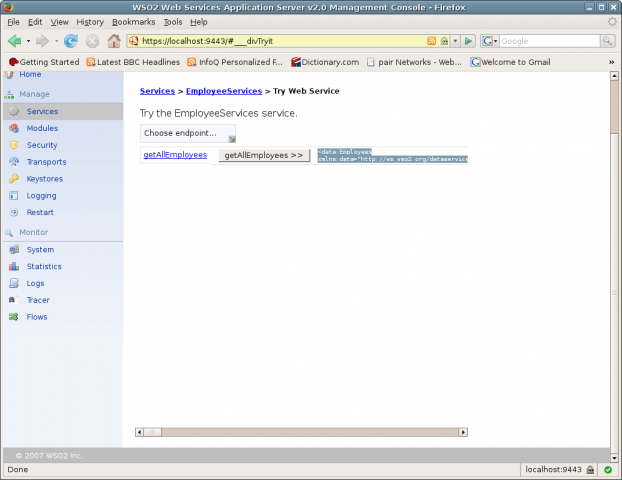
On the Try It page, click getAllEmployees to invoke the service.
References
1.Data Service Specification
Author
Sumedha Rubasinghe, Senior Software Engineer, WSO2 Inc. sumedha at wso2 dot com