Build an Event-Driven Integration
Orders queue in RabbitMQ broker and processes them.Event integrations are designed for reactive workflows triggered by messages from a broker. This quick start demonstrates the complete flow: creating a RabbitMQ message listener, adding an event handler to process messages, and implementing the integration logic executed when a message is received.
Prerequisites
A working WSO2 Integrator environment.
You'll also need access to a RabbitMQ instance that is reachable over the internet. Have the following details ready:
- The instance's host and port.
- A username and password for the instance.
- The instance's virtual host.
If you don't have a RabbitMQ instance, create a free one on CloudAMQP using the Little Lemur plan. Then open the instance and find its connection details under AMQP details. Use port 5672, and use the User & Vhost value as both the username and the virtual host.
The cloud editor runs in WSO2 Cloud and cannot connect to a RabbitMQ instance running on localhost on your computer.
Step 1: Create the integration
-
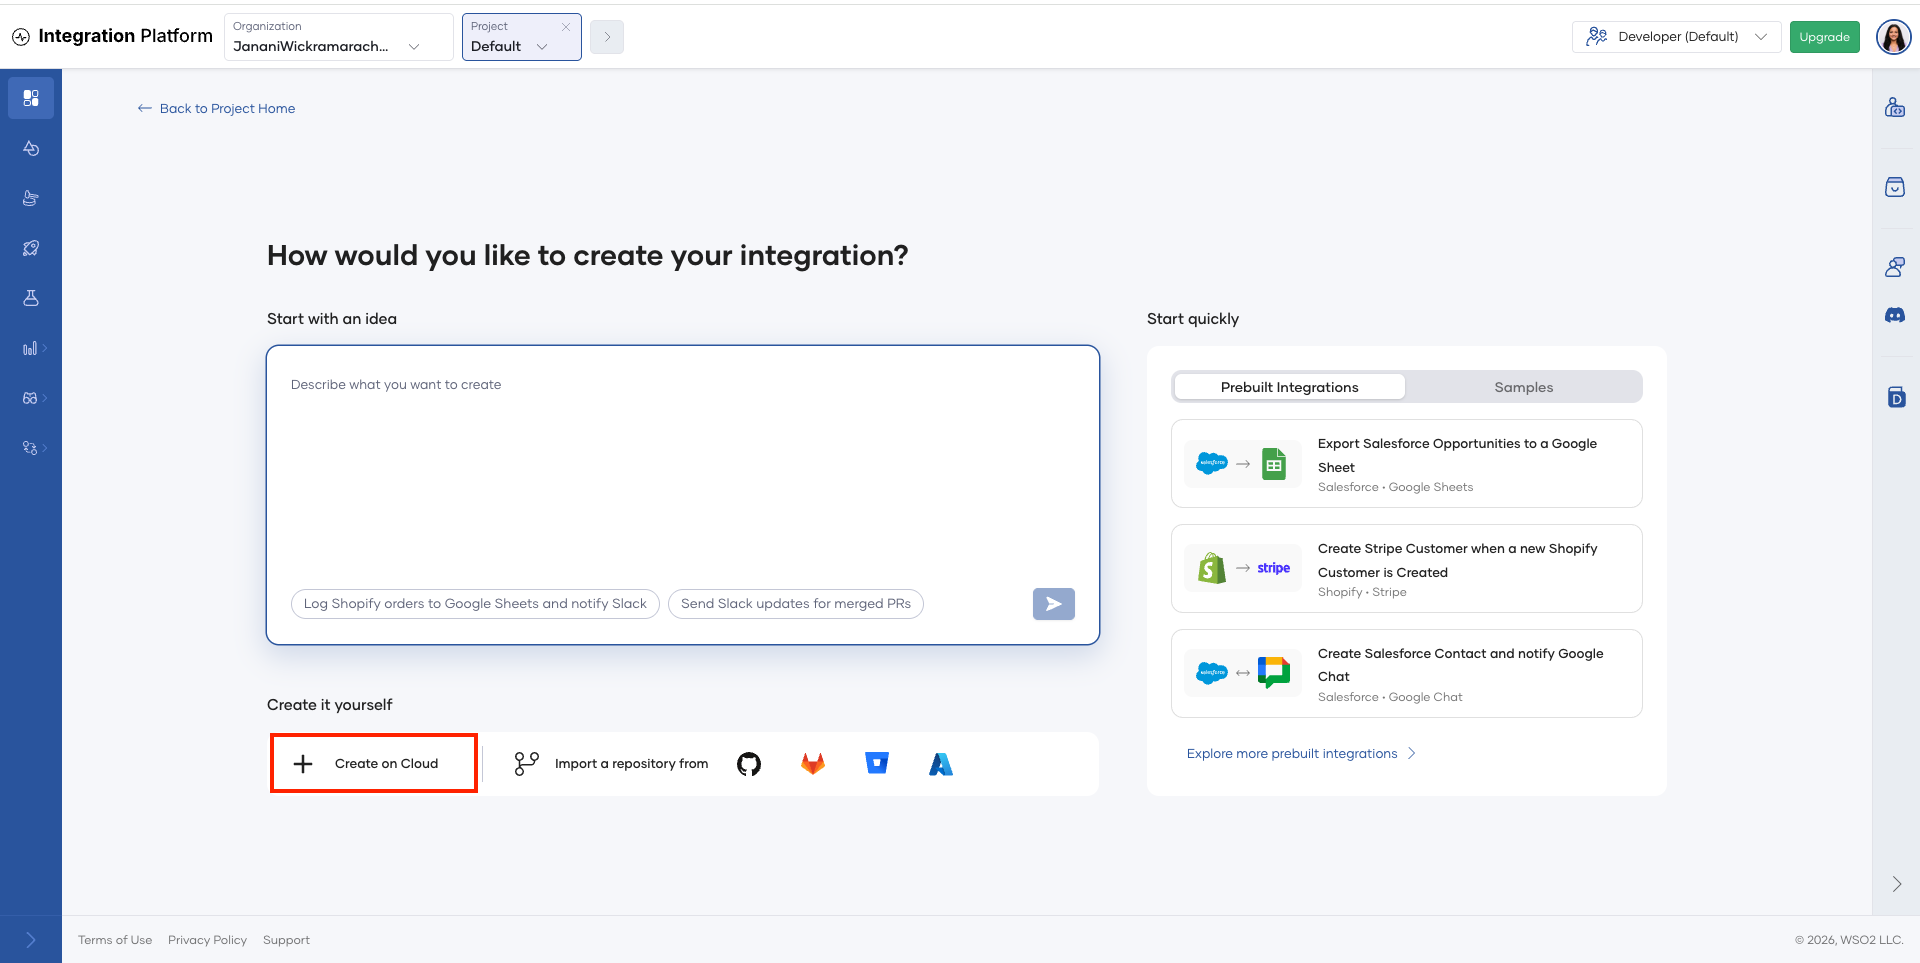
On the project home page, click Create on Cloud.
-
The WSO2 Integrator cloud editor opens in your browser.
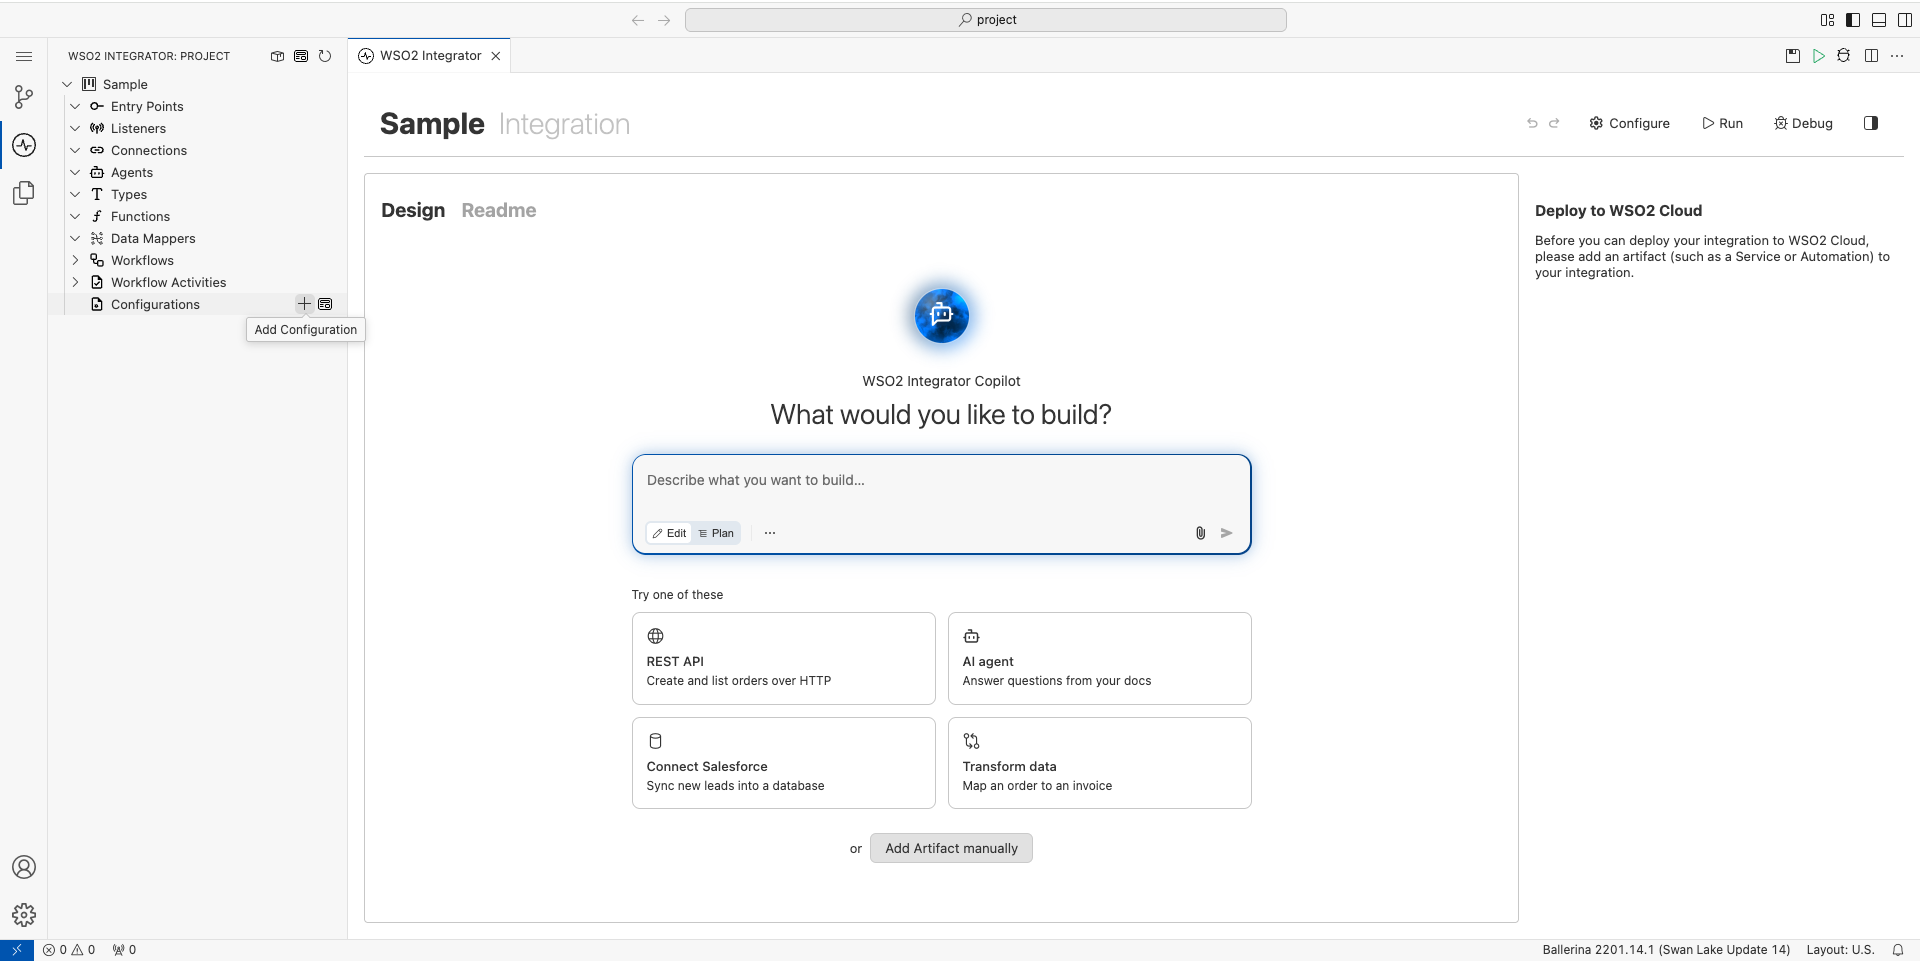
The cloud editor creates a default integration for you, so you don't need to name it now. You can change its name when you deploy it. For more information, see Save and deploy.
Step 2: Add a RabbitMQ event listener
-
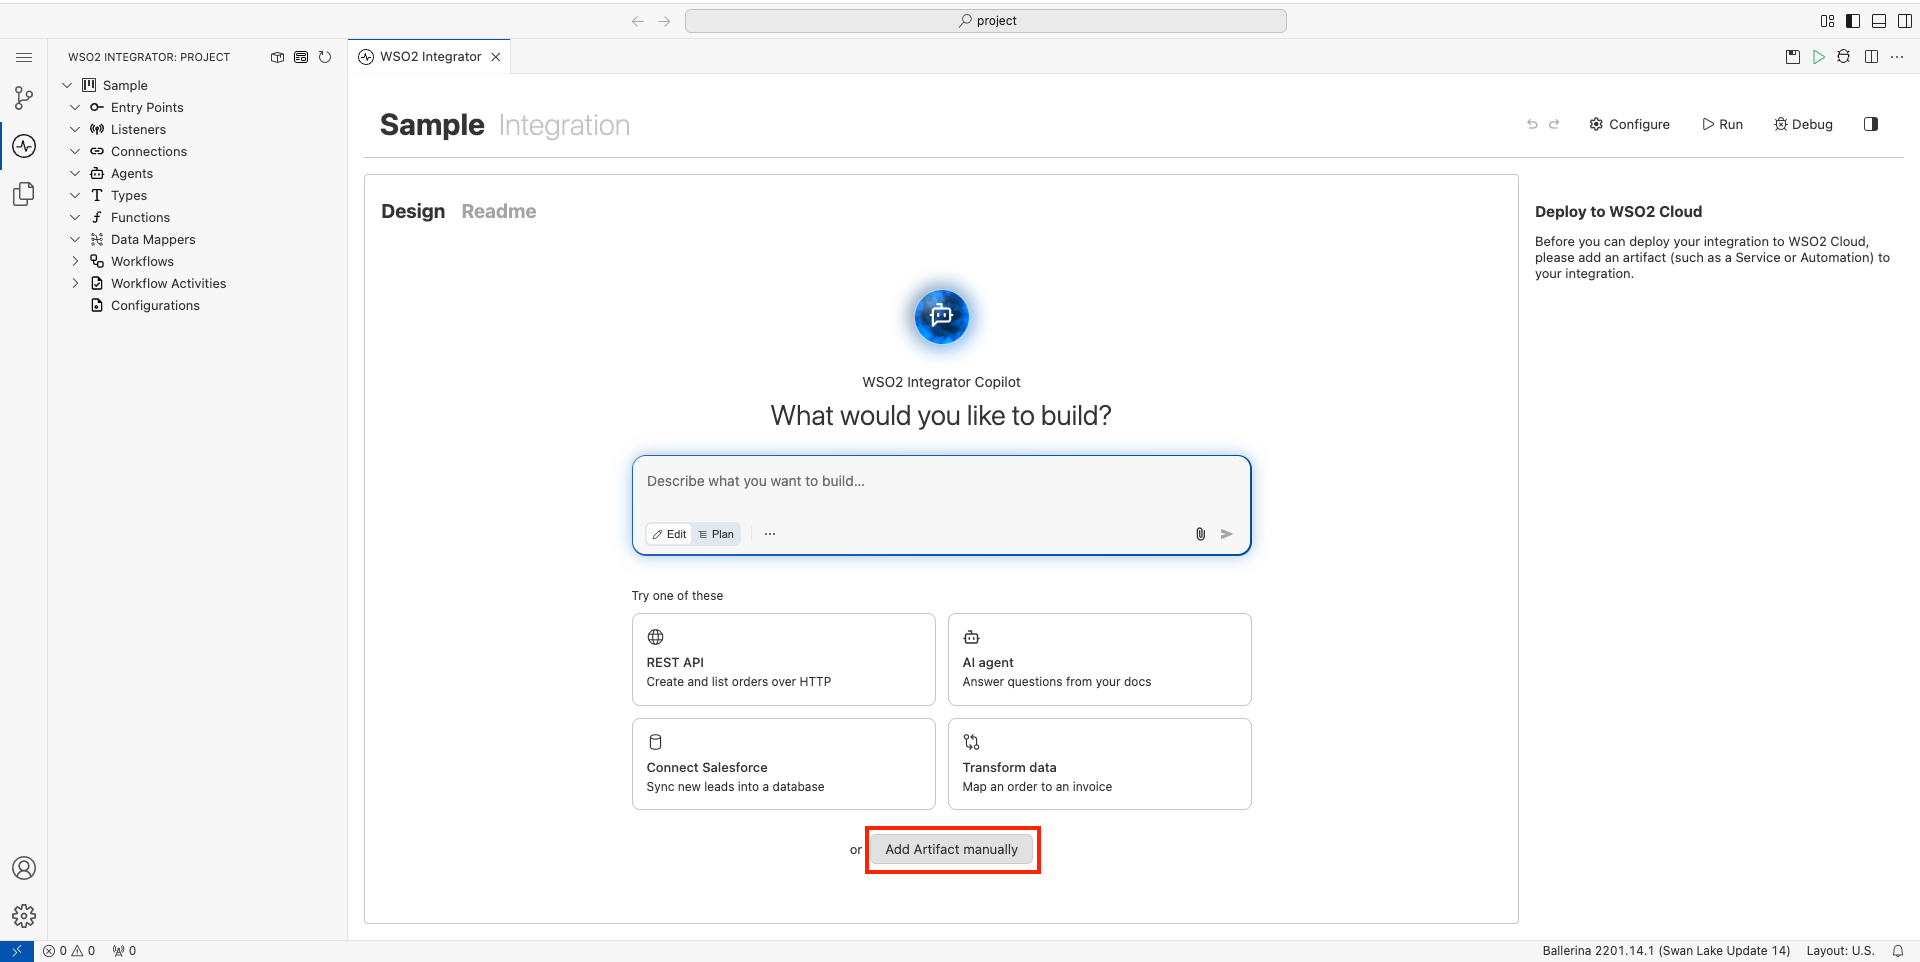
In the design view, click Add Artifact manually.
-
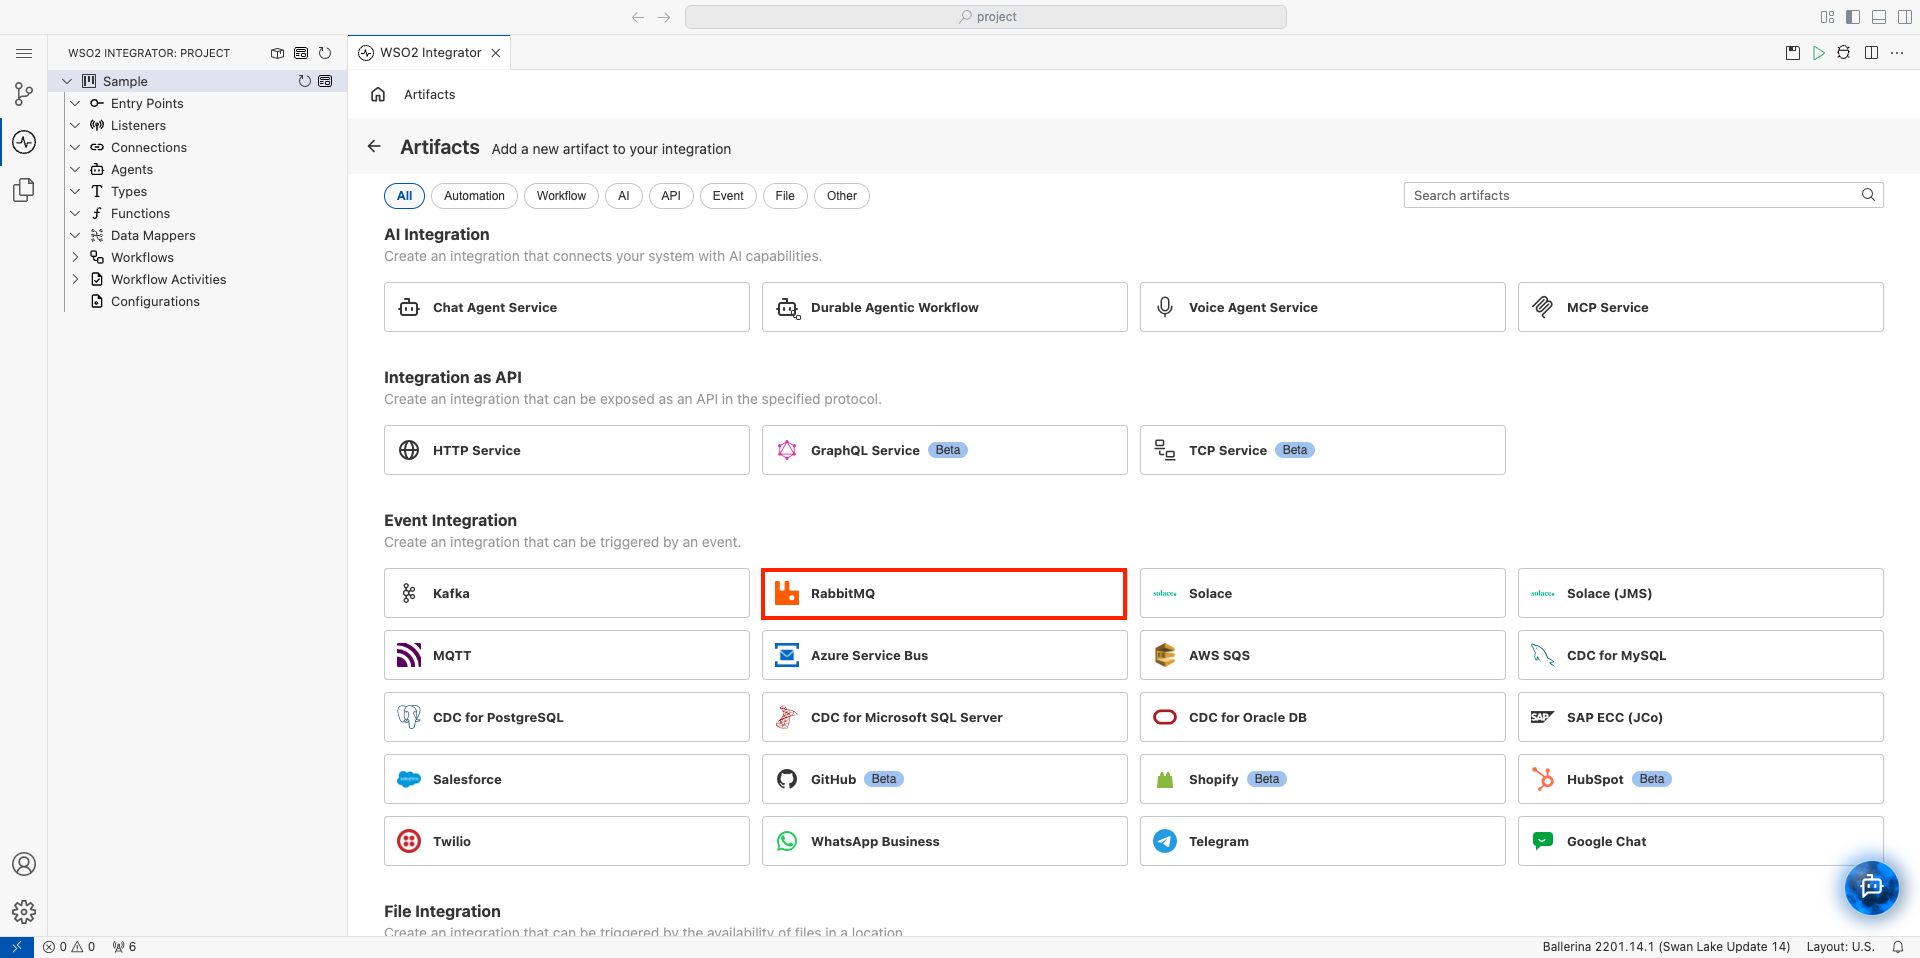
Select RabbitMQ under Event Integration.
-
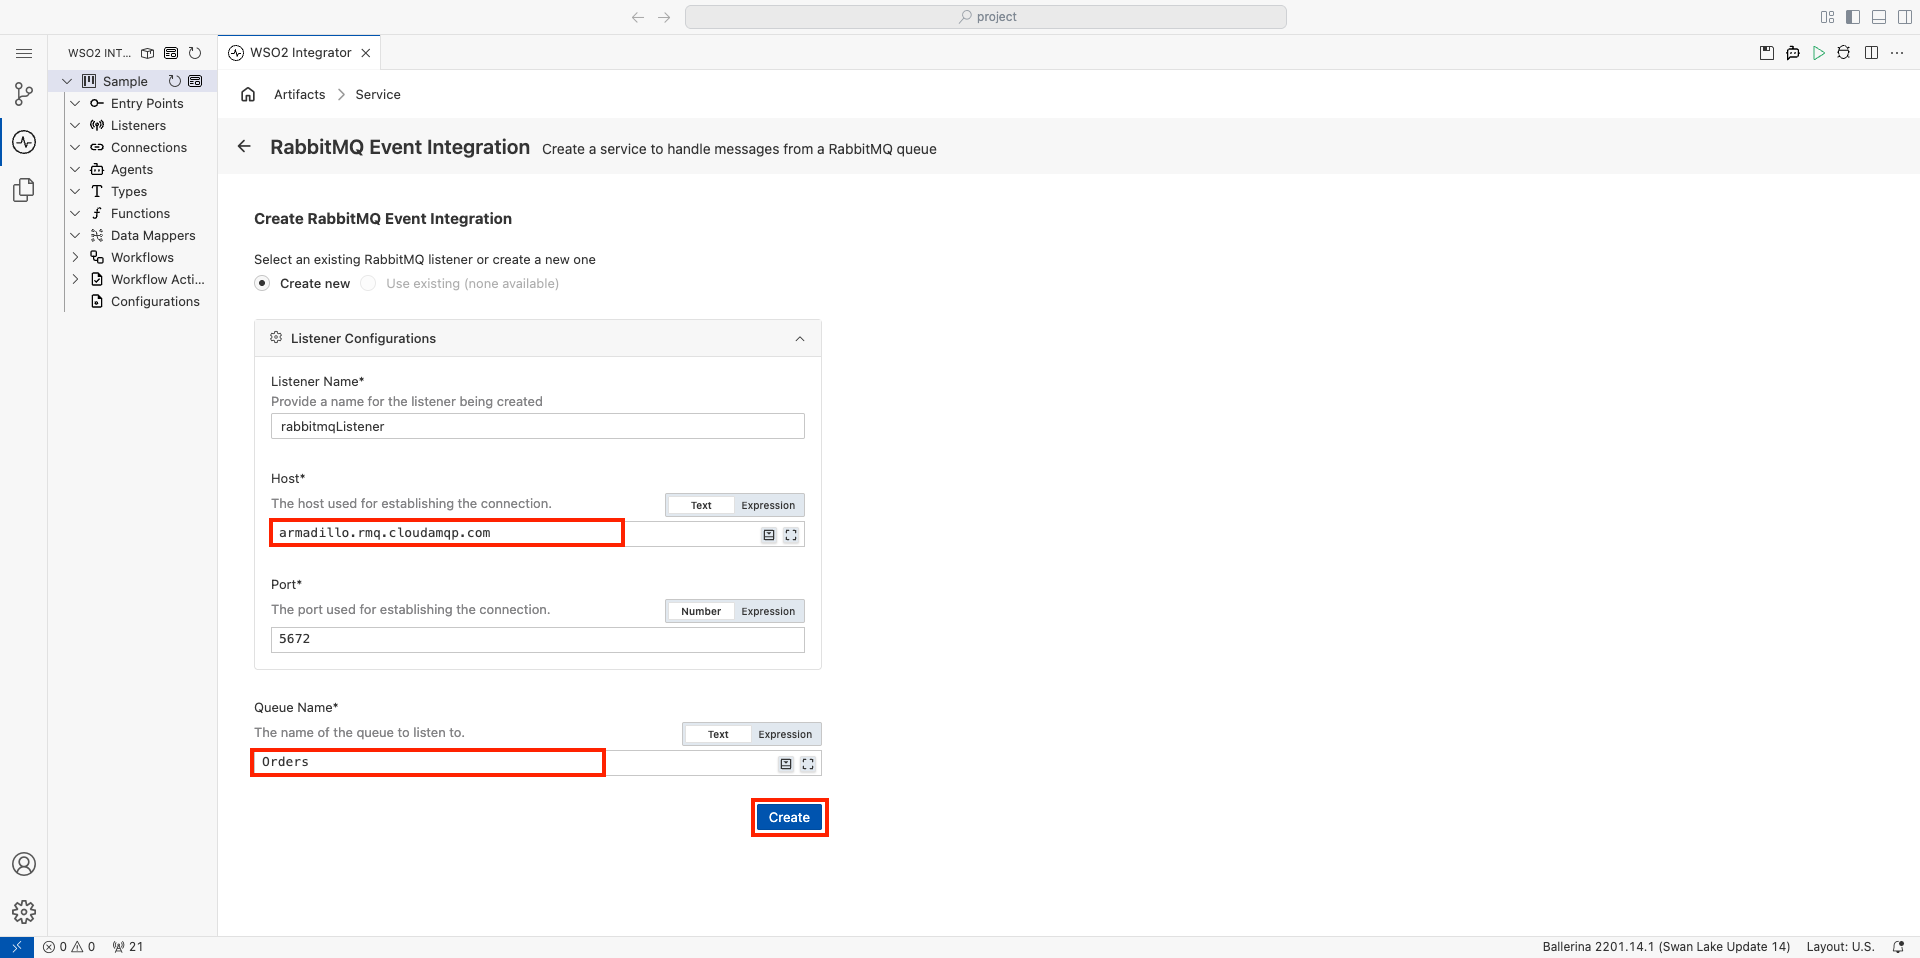
Set Host to your RabbitMQ instance's host, and Port to its port. The default RabbitMQ port is
5672. -
Set Queue Name to
Orders. -
Click Create.
-
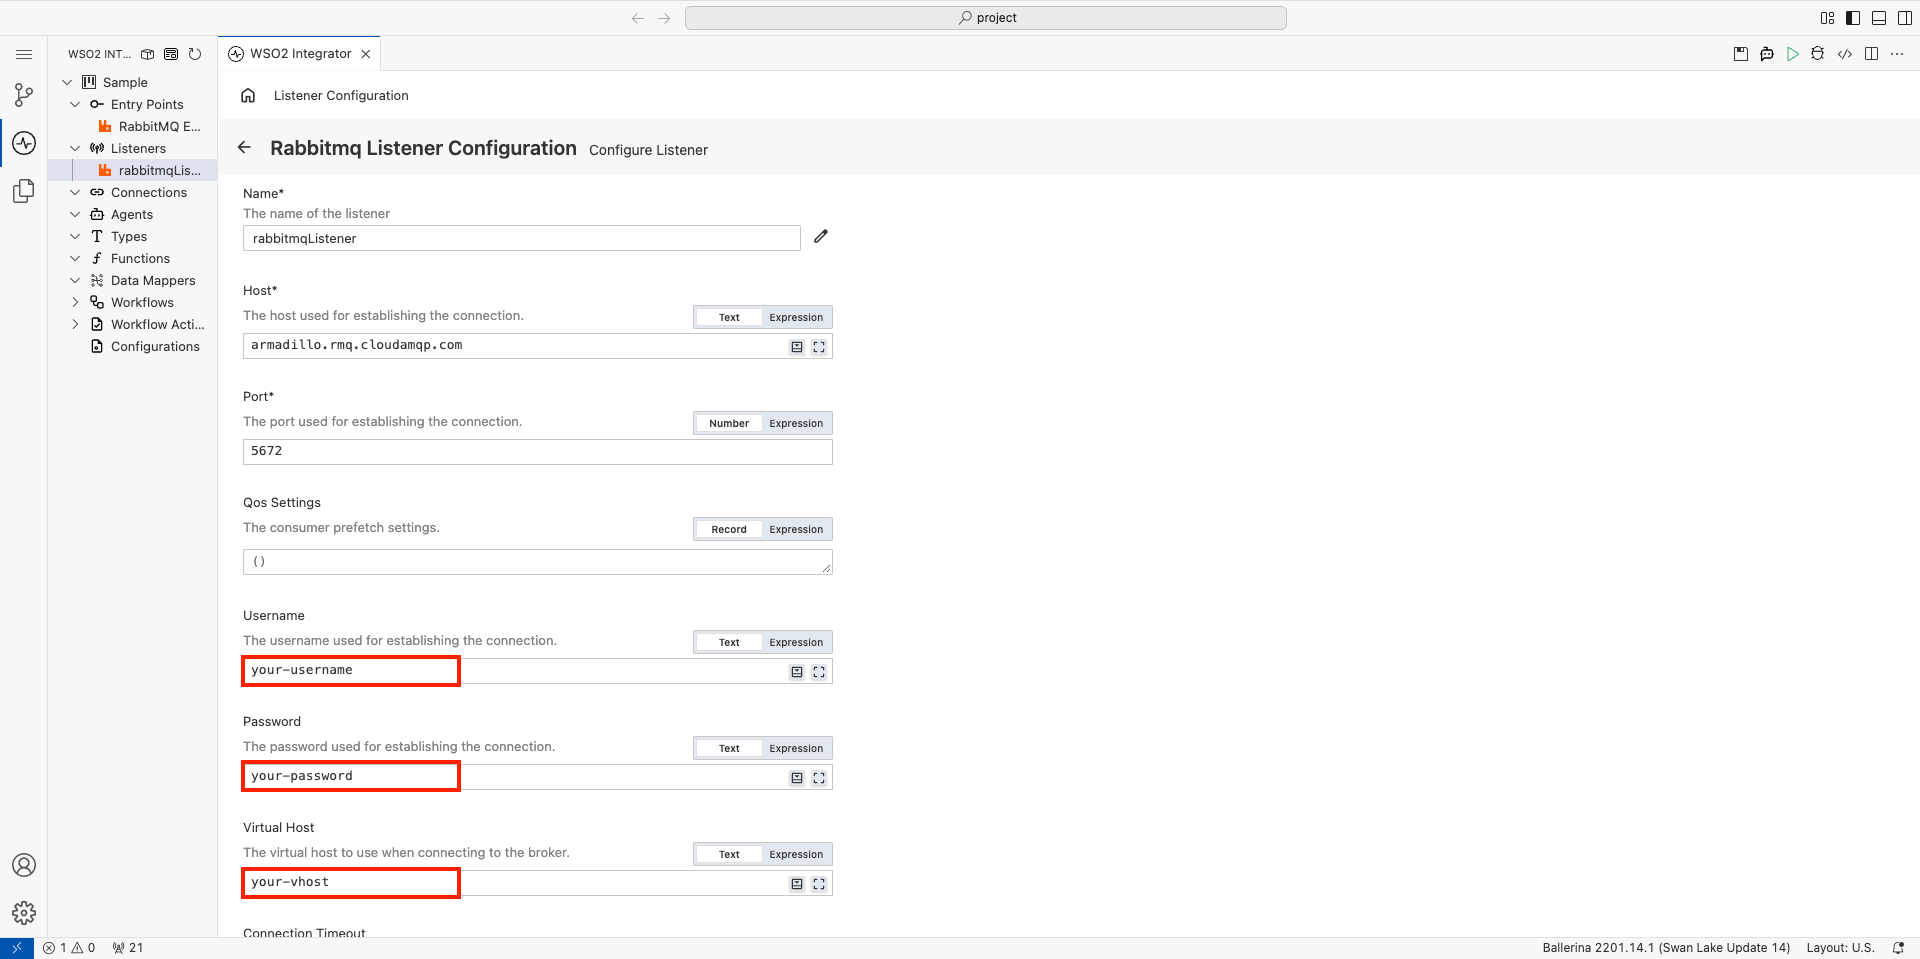
Under Listeners in the project explorer, select rabbitmqListener to open the Rabbitmq Listener Configuration page.
-
Set Username and Password to your RabbitMQ instance's username and password.
-
Set Virtual Host to your instance's virtual host. For CloudAMQP, this is the same as the username.
-
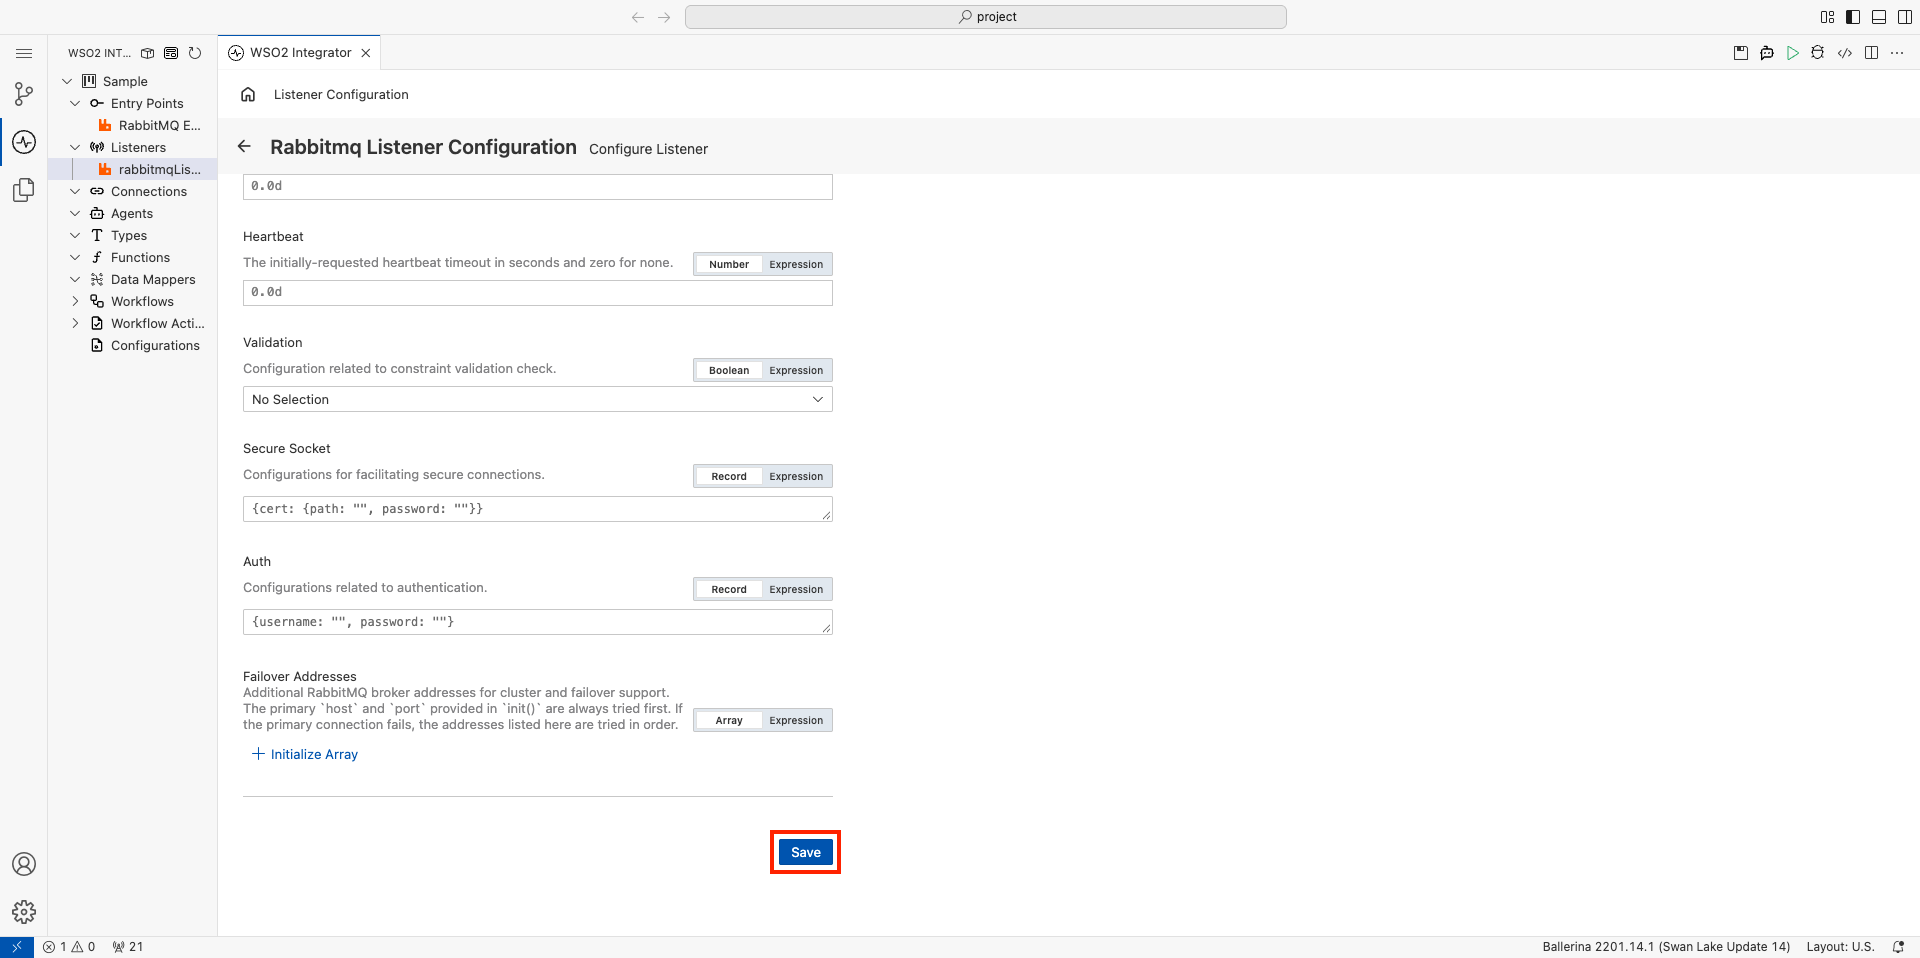
Scroll to the bottom of the page, and click Save.
Step 3: Add onMessage event handler
-
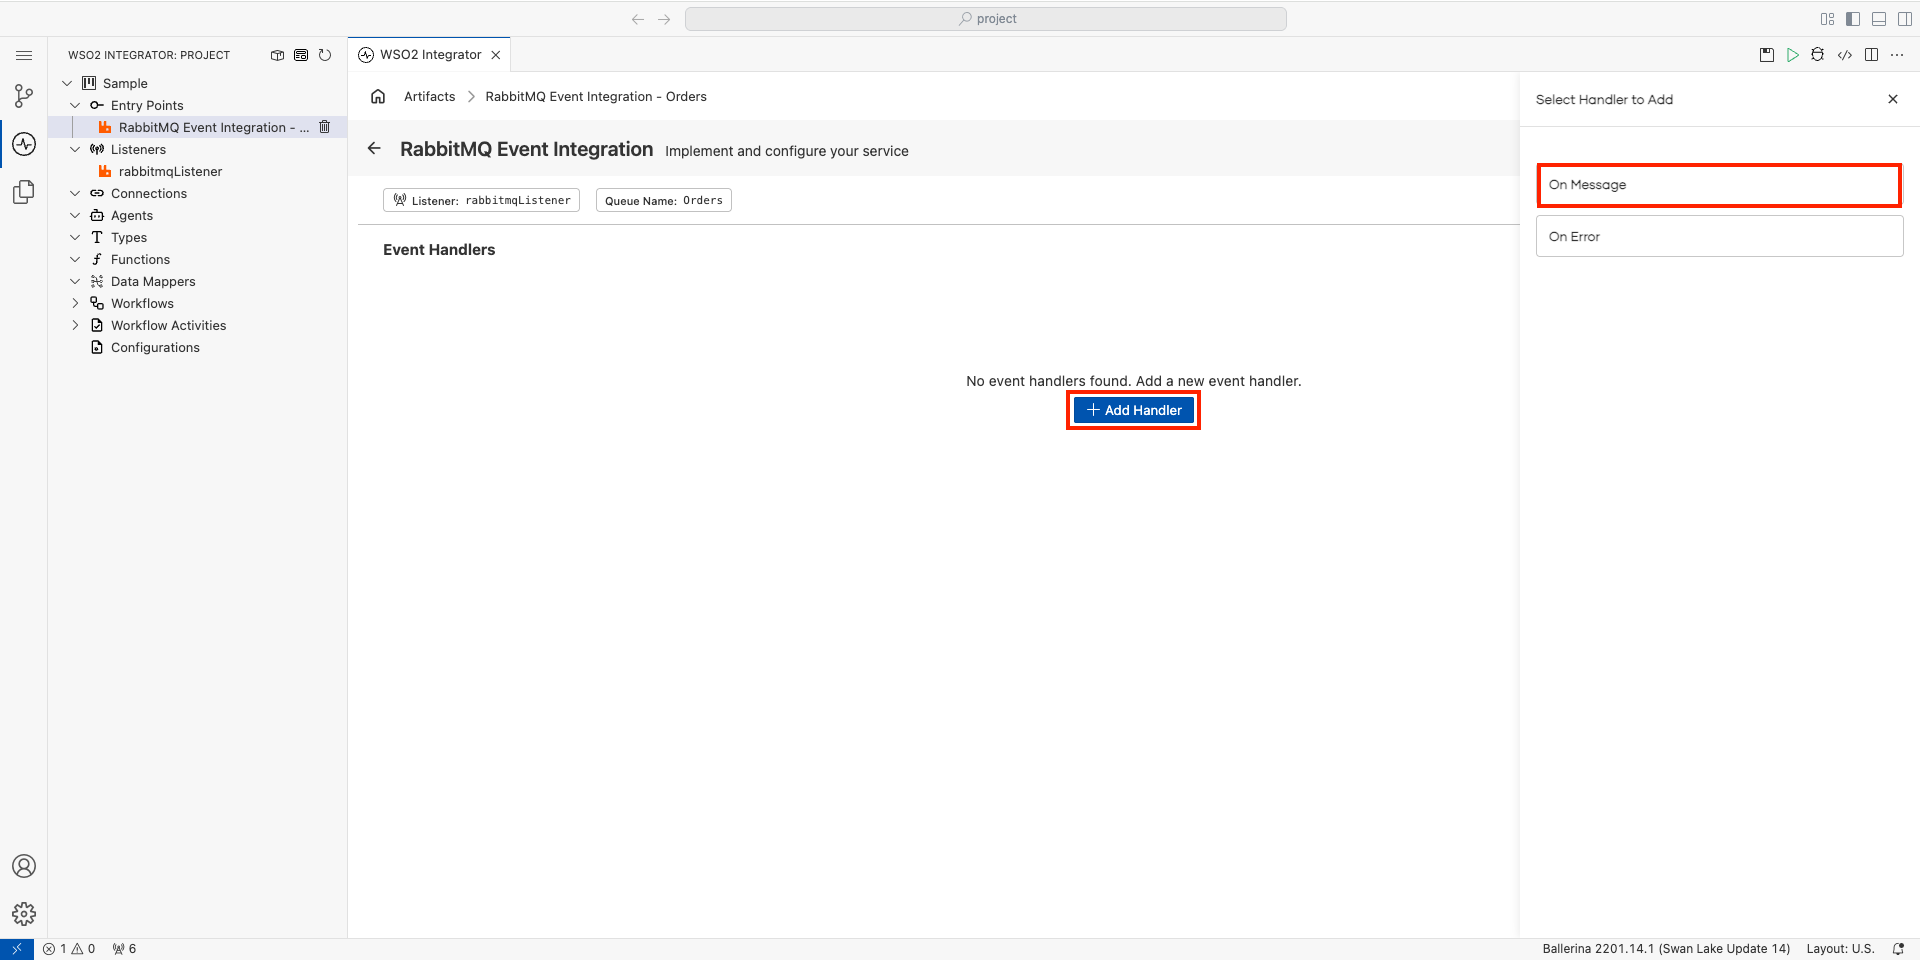
Under Entry Points in the project explorer, select RabbitMQ Event Integration to open the service design view.
-
Click + Add Handler.
-
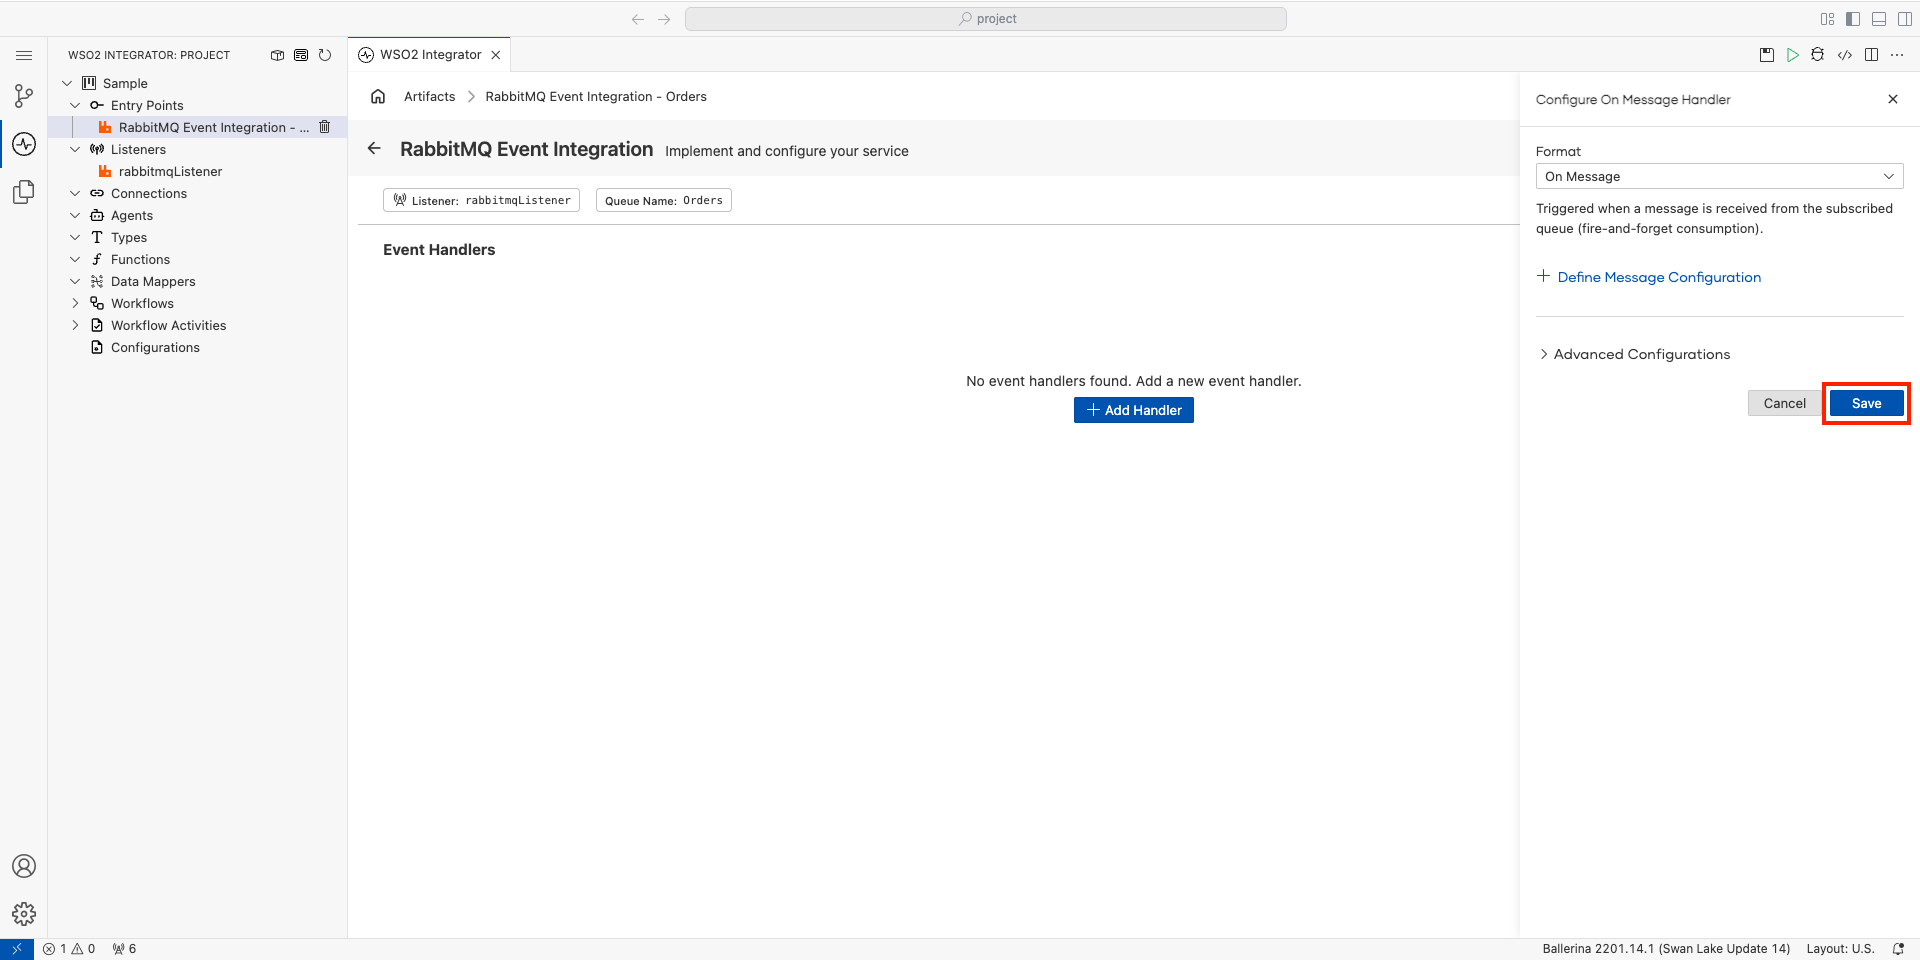
In the Select Handler to Add panel, select On Message.
-
Click Save.
Step 4: Add message processing logic
-
Click + inside the
onMessageflow.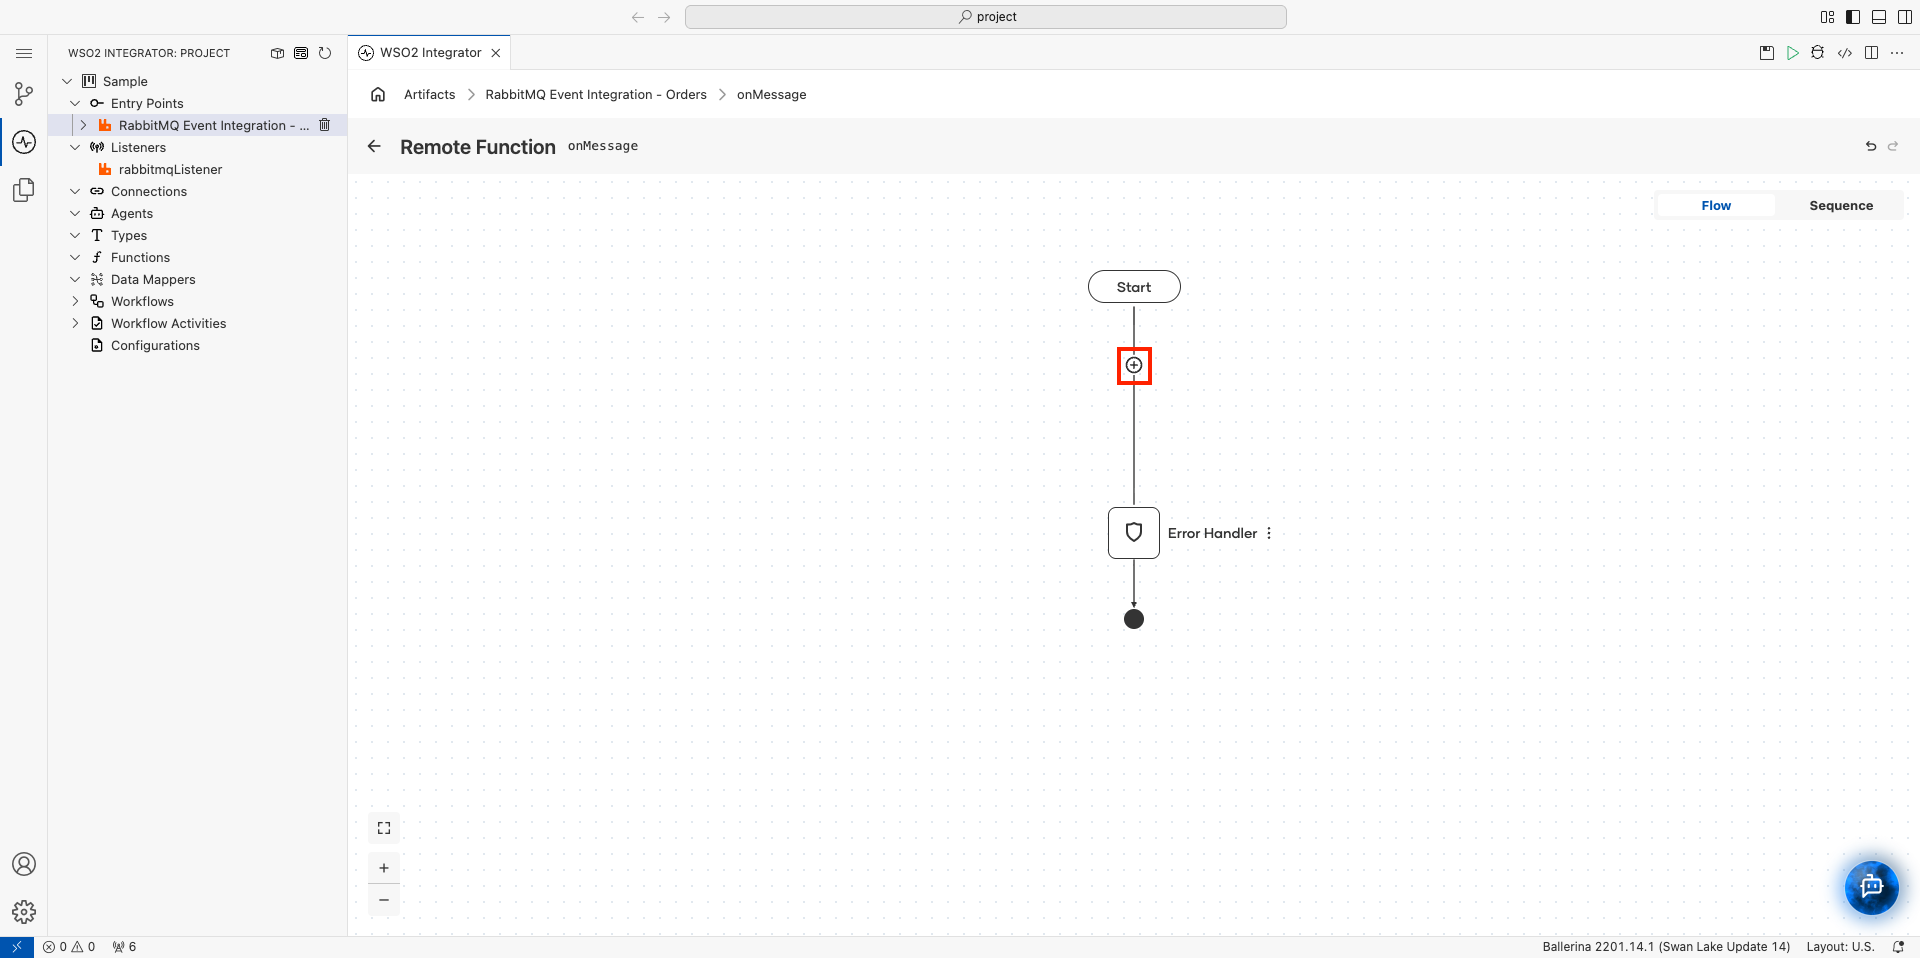
-
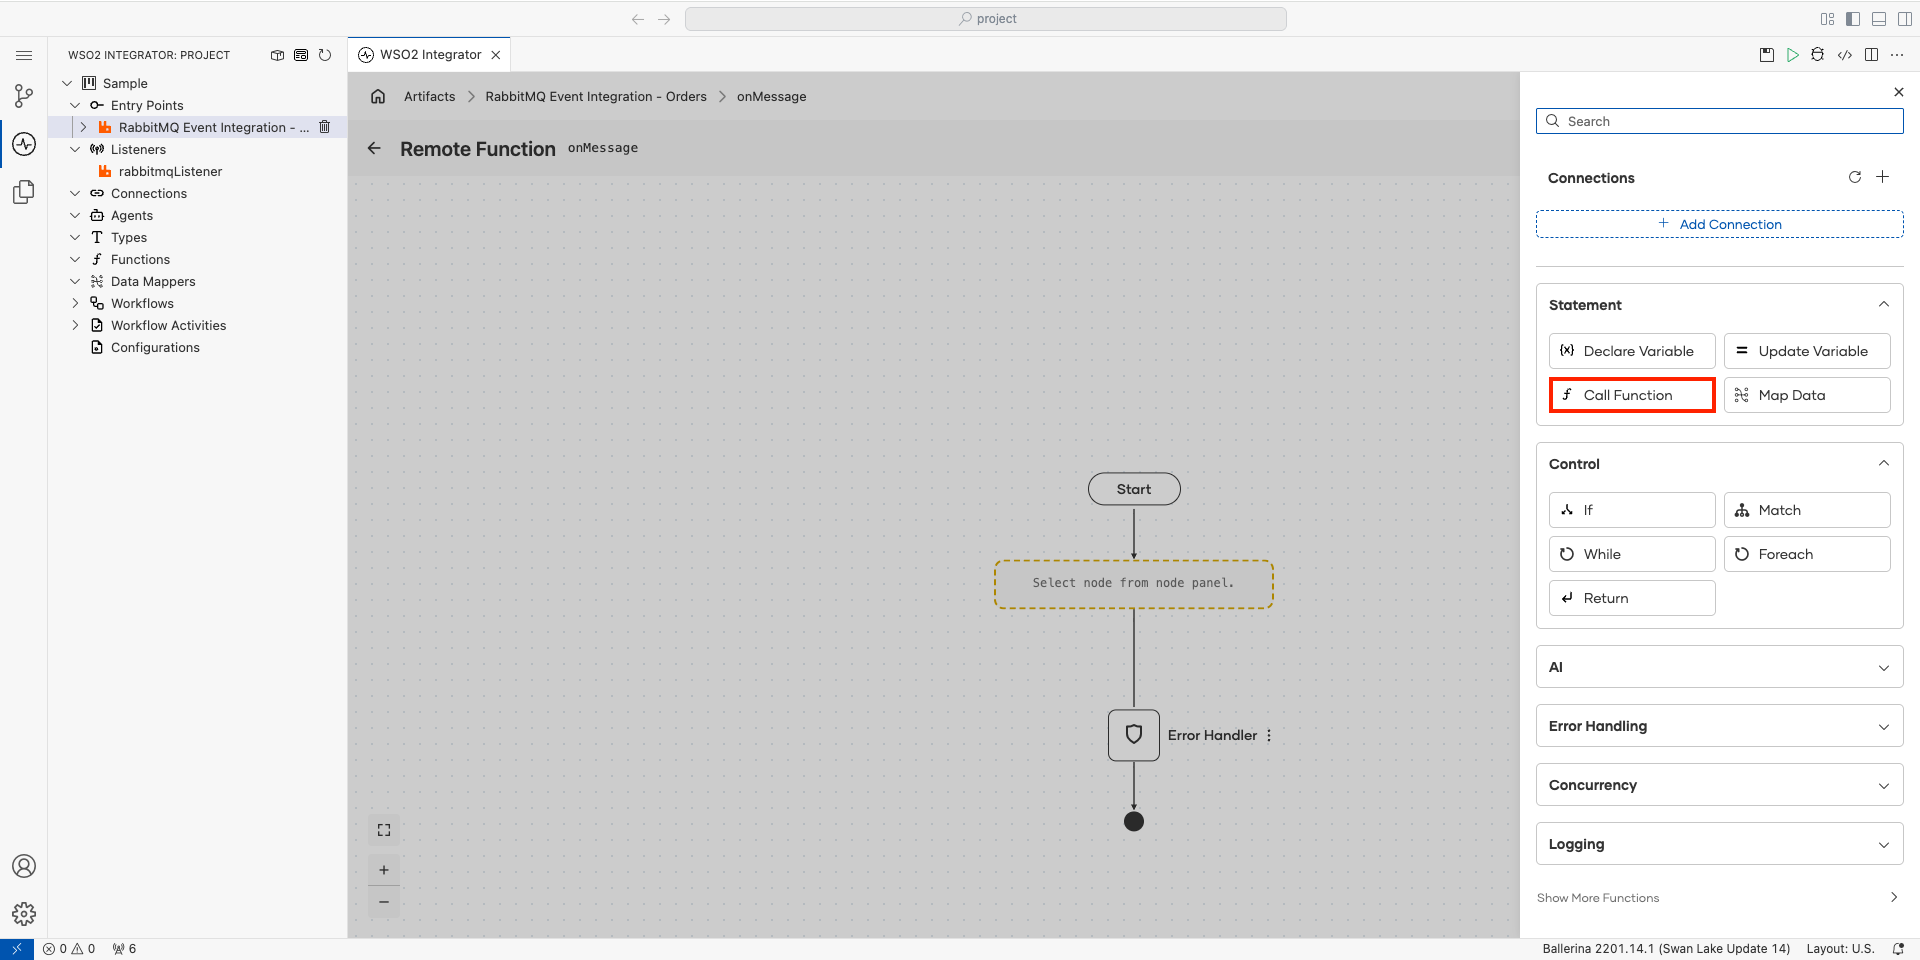
Select Call Function under Statement.
-
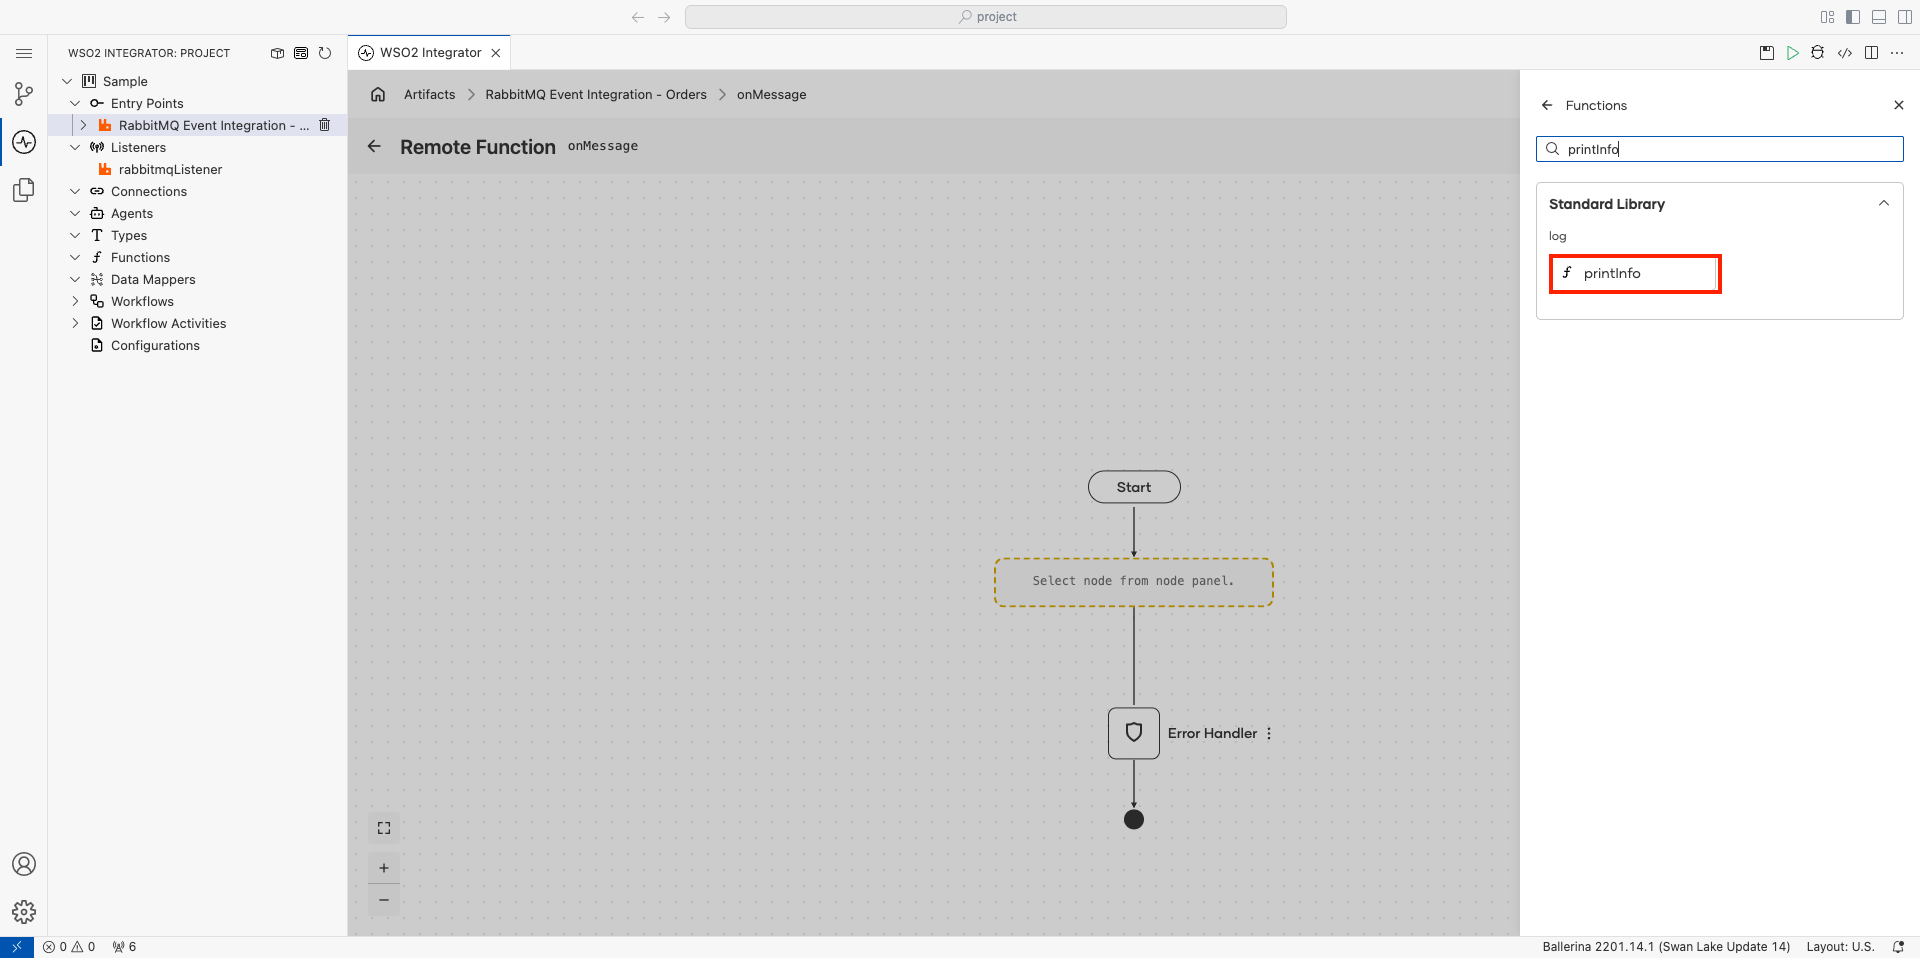
Search for
printInfoin the functions panel. -
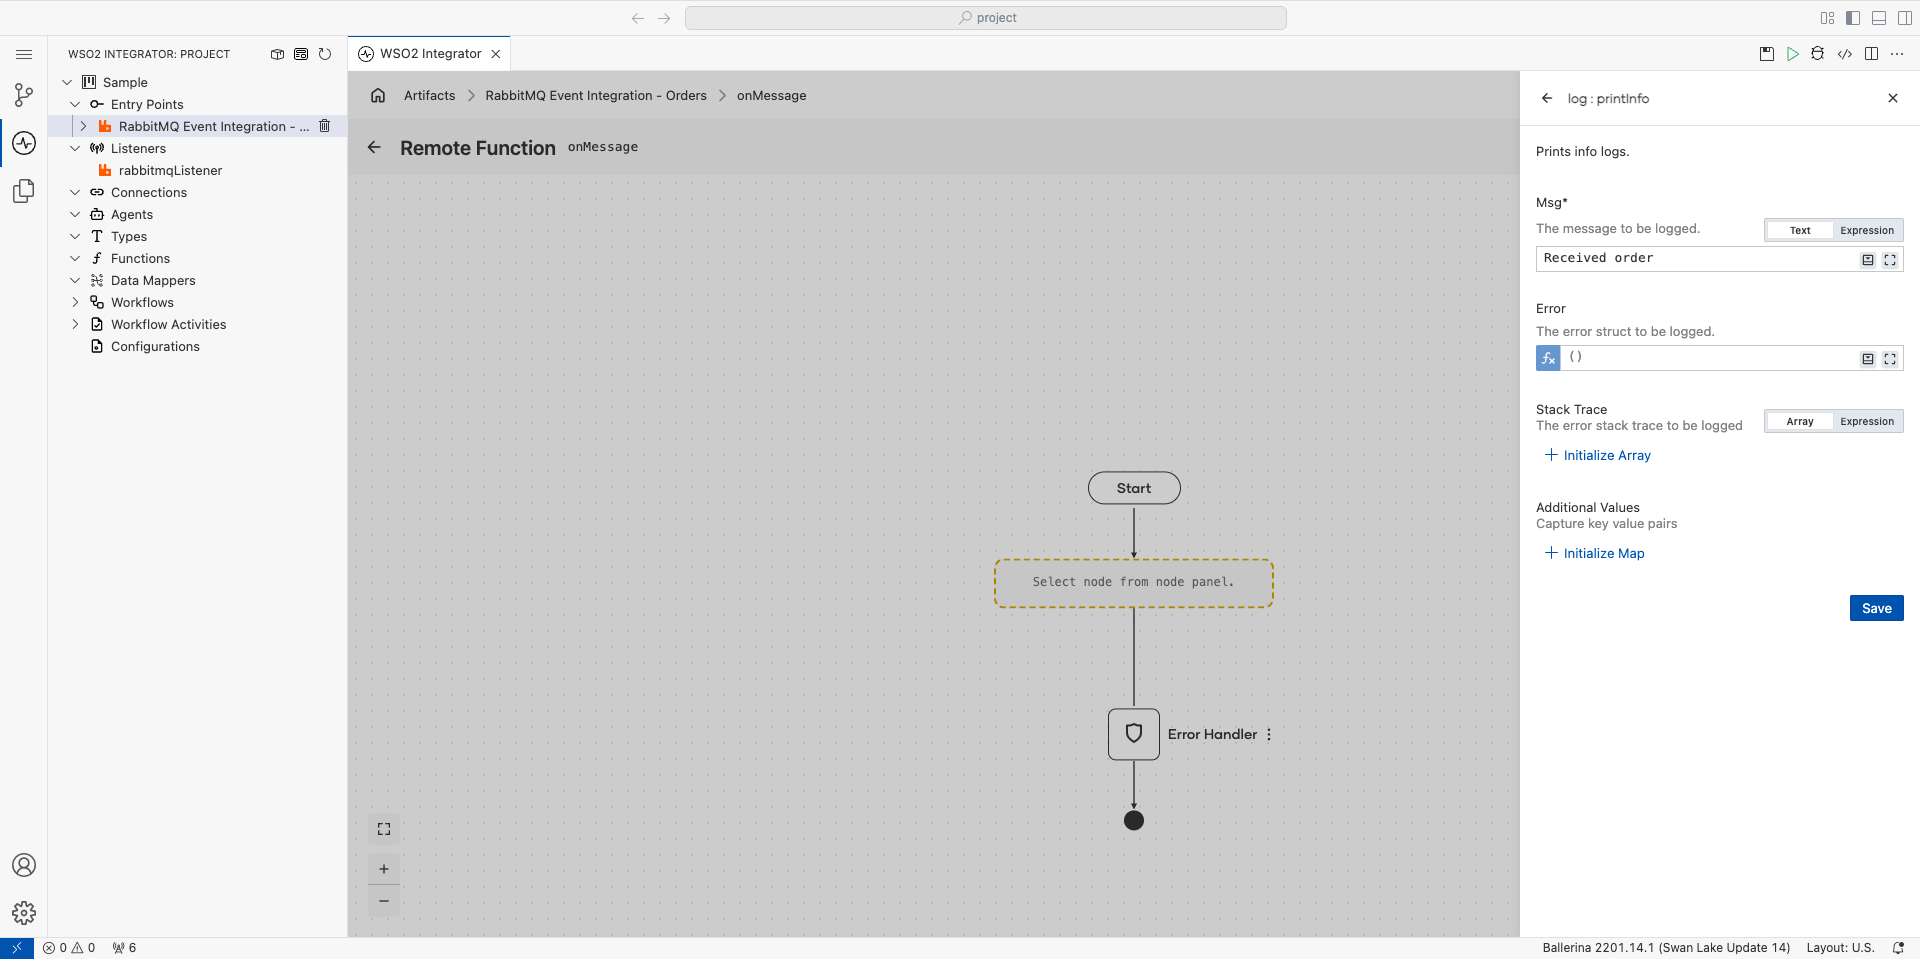
In the search results, go to the Standard Library section and select the printInfo function under log.
-
Set Msg to
Received order. -
Click Save.
Step 5: Run and test the integration
-
Click Run. The integration starts and listens for messages on the
Ordersqueue. -
In CloudAMQP, open your instance and click RabbitMQ Manager. The RabbitMQ management UI opens in a new tab, already signed in.
-
Click the Queues and Streams tab, and then click Orders in the Name column.
-
On the Orders queue page, scroll down and click the Publish message section heading to open it.
-
In Payload, enter any text, for example
order 1. -
Click the Publish message button below the Payload box.
-
Confirm the Debug Console shows a log line that ends with
message="Received order".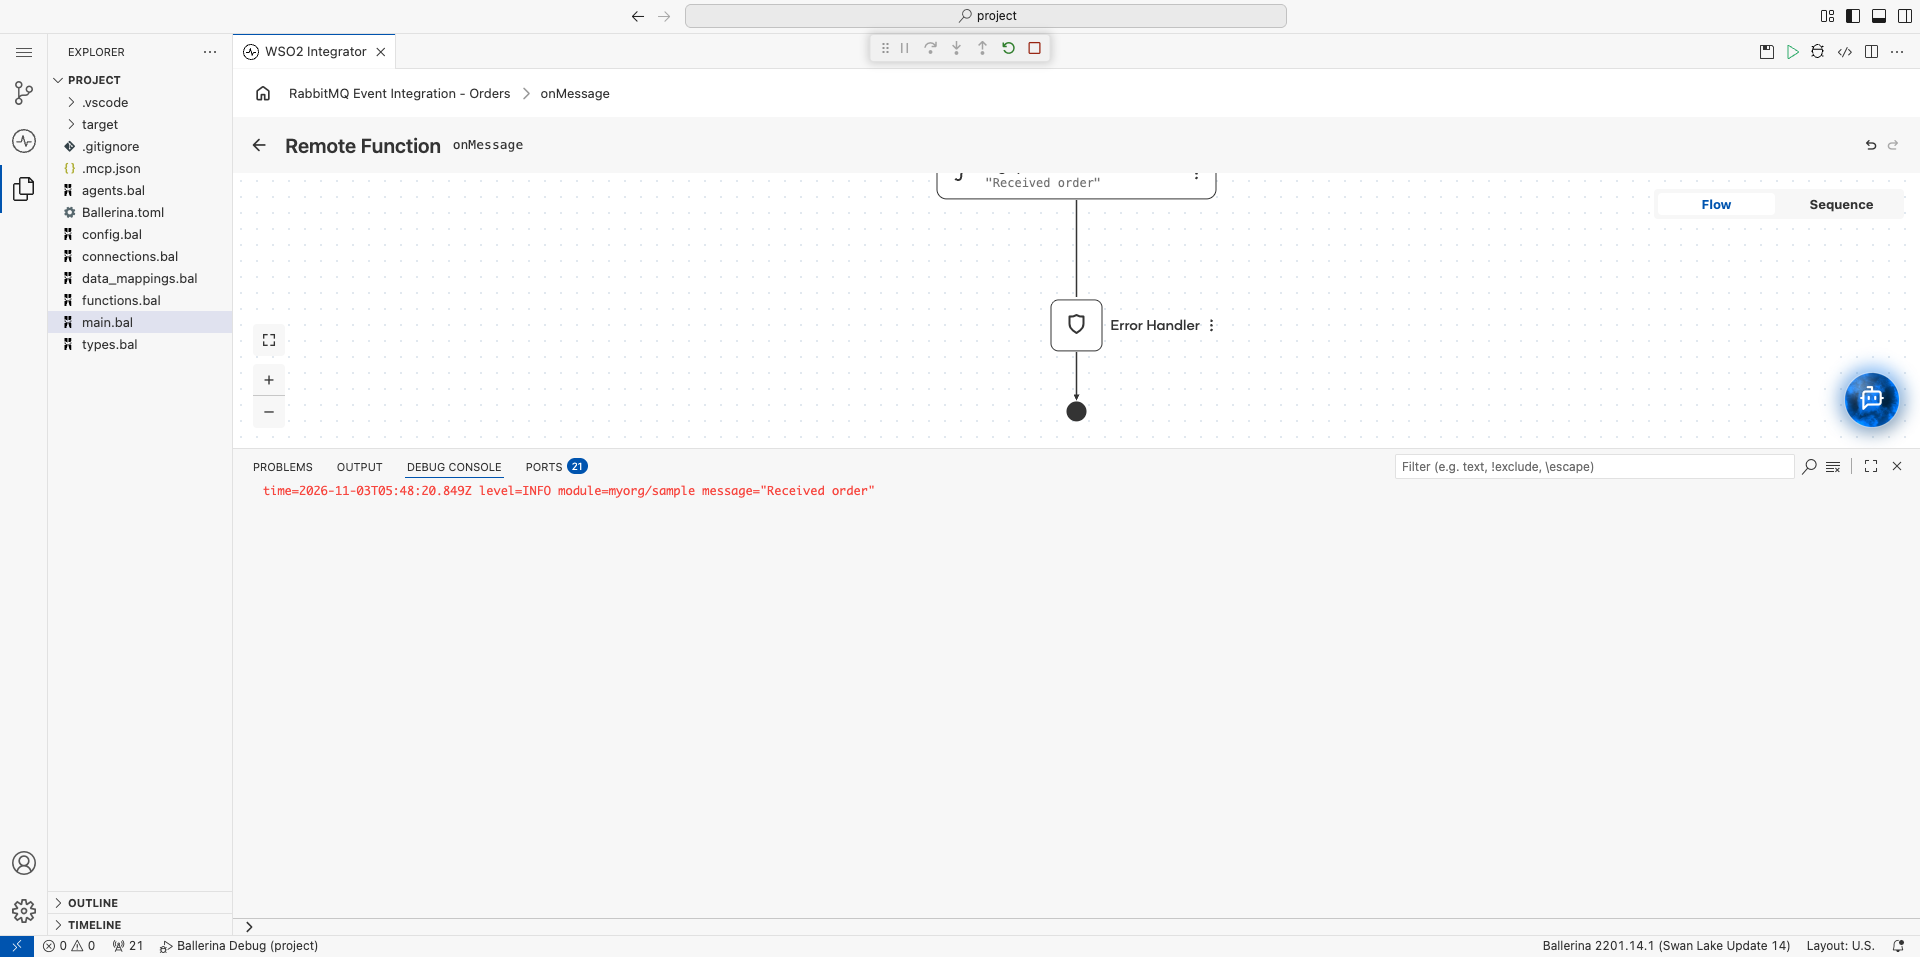
Step 6: Deploy to WSO2 Cloud
To deploy your integration to WSO2 Cloud from the cloud editor, see Save and deploy.
Source code
View the generated Ballerina code
The steps above generate the following complete, runnable Ballerina program:
import ballerina/log;
import ballerinax/rabbitmq;

listener rabbitmq:Listener rabbitmqListener = new (host = "<your-rabbitmq-host>", port = 5672, username = "<your-username>", password = "<your-password>", virtualHost = "<your-vhost>");

@rabbitmq:ServiceConfig {queueName: "Orders"}
service rabbitmq:Service on rabbitmqListener {
    remote function onMessage(rabbitmq:AnydataMessage message) returns error? {
        do {
            log:printInfo("Received order");
        } on fail error err {
            // handle error
            return error("unhandled error", err);
        }
    }
}
Supported event sources
| Broker | Ballerina Package |
|---|---|
| Apache Kafka | ballerinax/kafka |
| RabbitMQ | ballerinax/rabbitmq |
| MQTT | ballerinax/mqtt |
| Azure Service Bus | ballerinax/azure.servicebus |
| Salesforce | ballerinax/salesforce |
| GitHub Webhooks | ballerinax/github |
Learn more
- Kafka — Consume and produce Kafka messages
- Azure Service Bus — Integrate with Azure Service Bus queues and topics
- RabbitMQ — Full RabbitMQ listener and publisher reference
- MQTT — Handle MQTT messages from IoT and messaging devices
- CDC for PostgreSQL — React to database changes with change data capture