Build a File-Driven Integration
File integrations are ideal for batch uploads, scheduled file processing, and ETL workflows triggered by files appearing in a folder or FTP server. This quick start shows the full cycle: add an FTP integration artifact, add a handler that runs when a new file is created, and test it by uploading a file.
Prerequisites
A working WSO2 Integrator environment.
You'll also need access to an FTP, SFTP, or FTPS server that is reachable over the internet. Have the following details ready:
- The server's host and port.
- A username and password for the server.
- A folder on the server for the integration to watch, for example,
/quickstarts-file-integration. Create this folder before you start.
To test the integration, you'll also need an FTP or SFTP client to upload a file to the specified folder.
If you don't have a server, create a free test server on SFTPCloud by clicking Create test FTP server. Use the host, port, username, and password it shows.
The cloud editor runs in WSO2 Cloud and cannot connect to a server running on localhost on your computer. Make sure the server is accessible over the internet.
Step 1: Create the integration
-
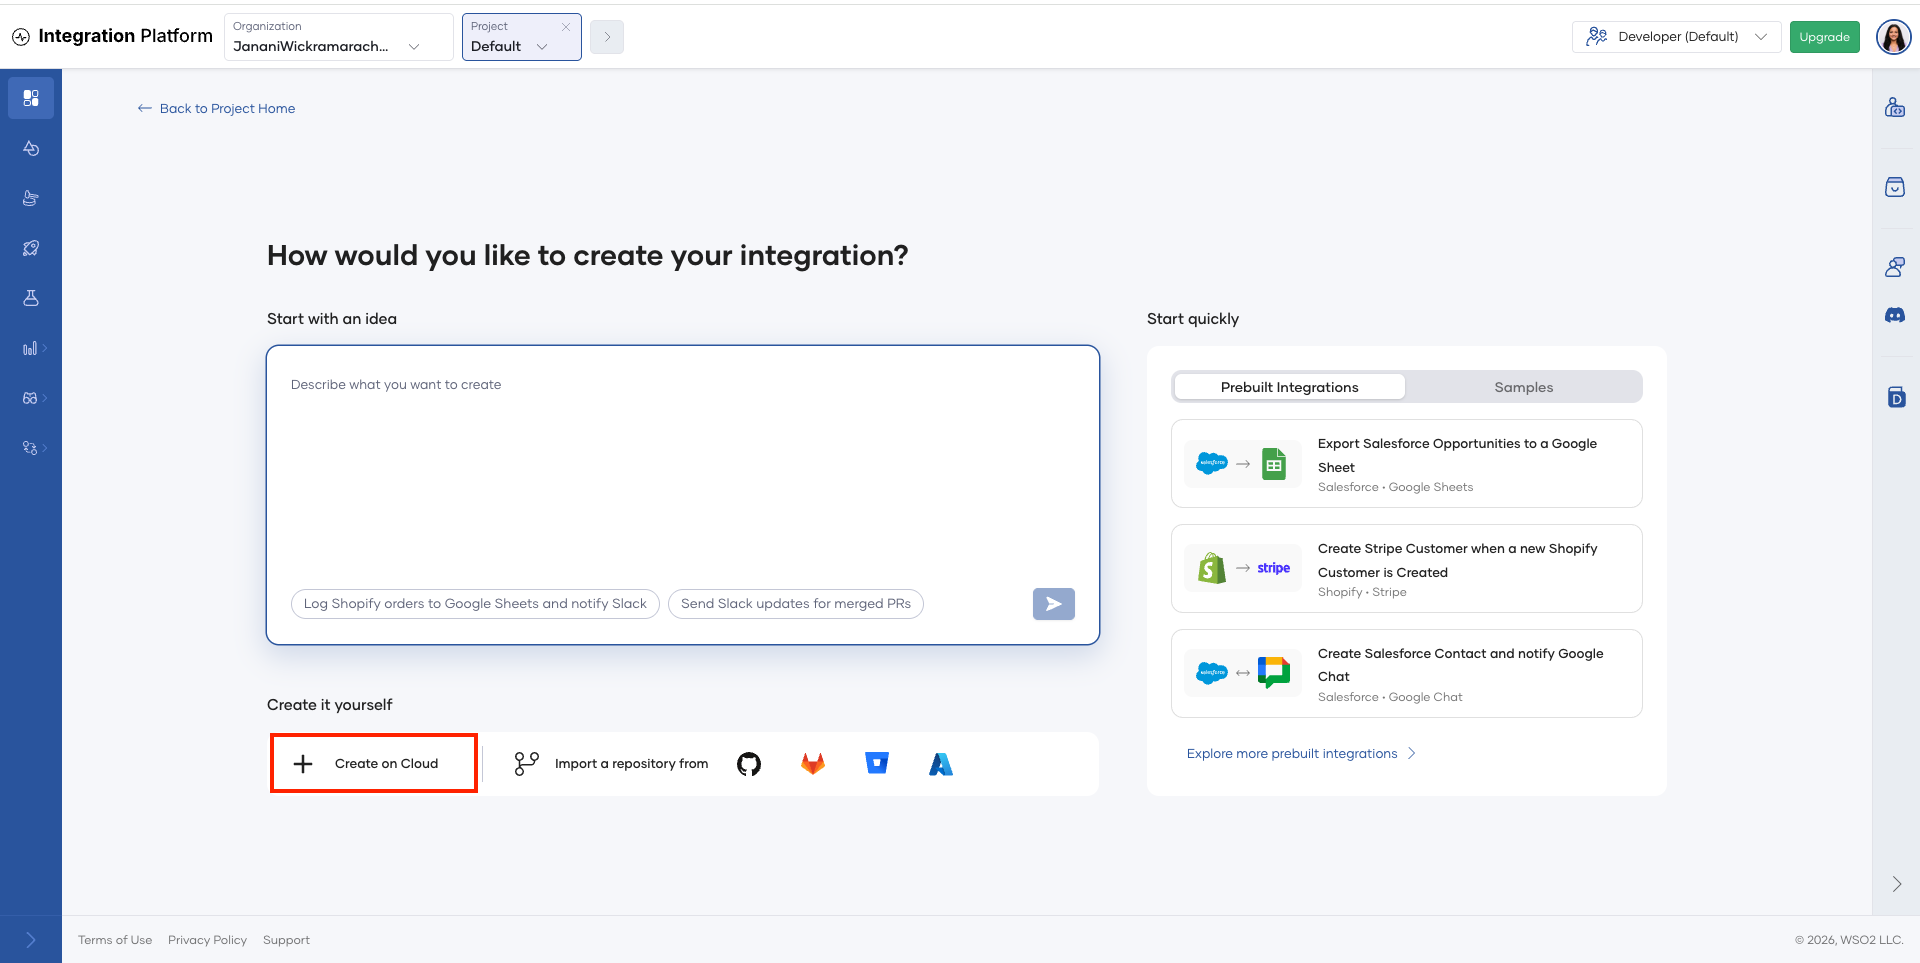
On the project home page, click Create on Cloud.
-
The WSO2 Integrator cloud editor opens in your browser.
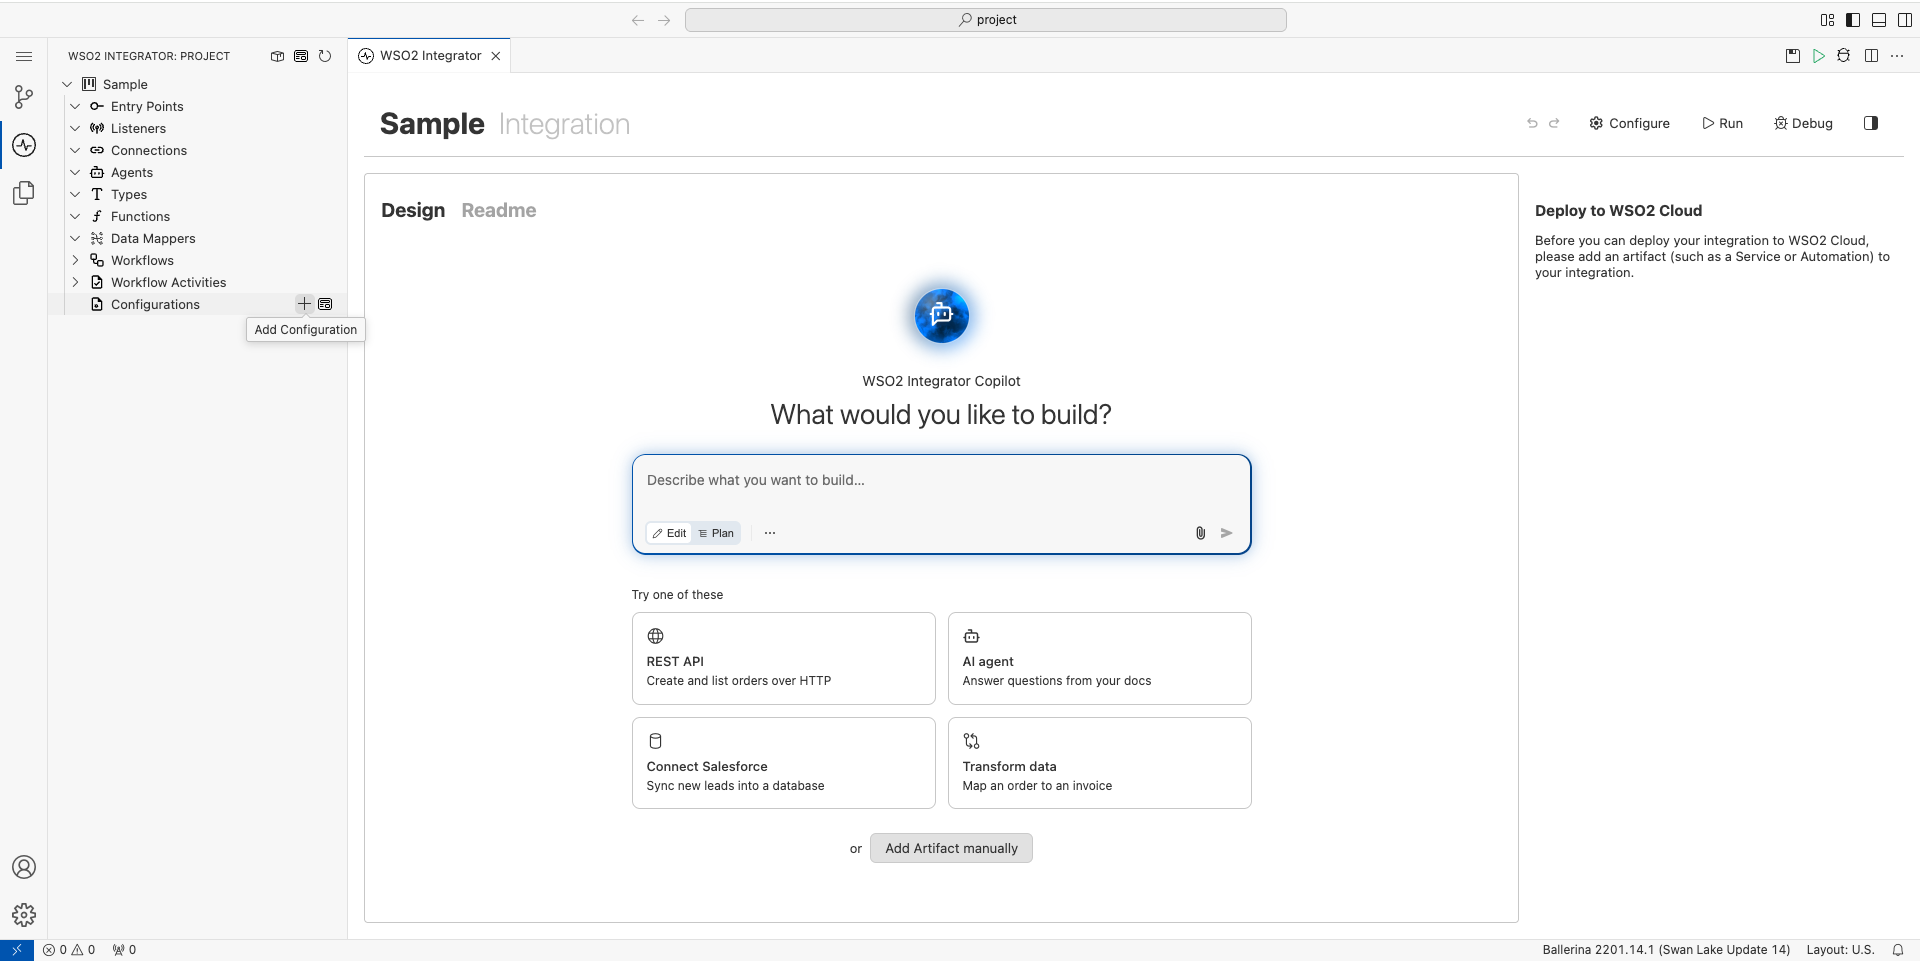
The cloud editor creates a default integration for you, so you don't need to name it now. You can change its name when you deploy it. For more information, see Save and deploy.
Step 2: Add a file integration artifact
-
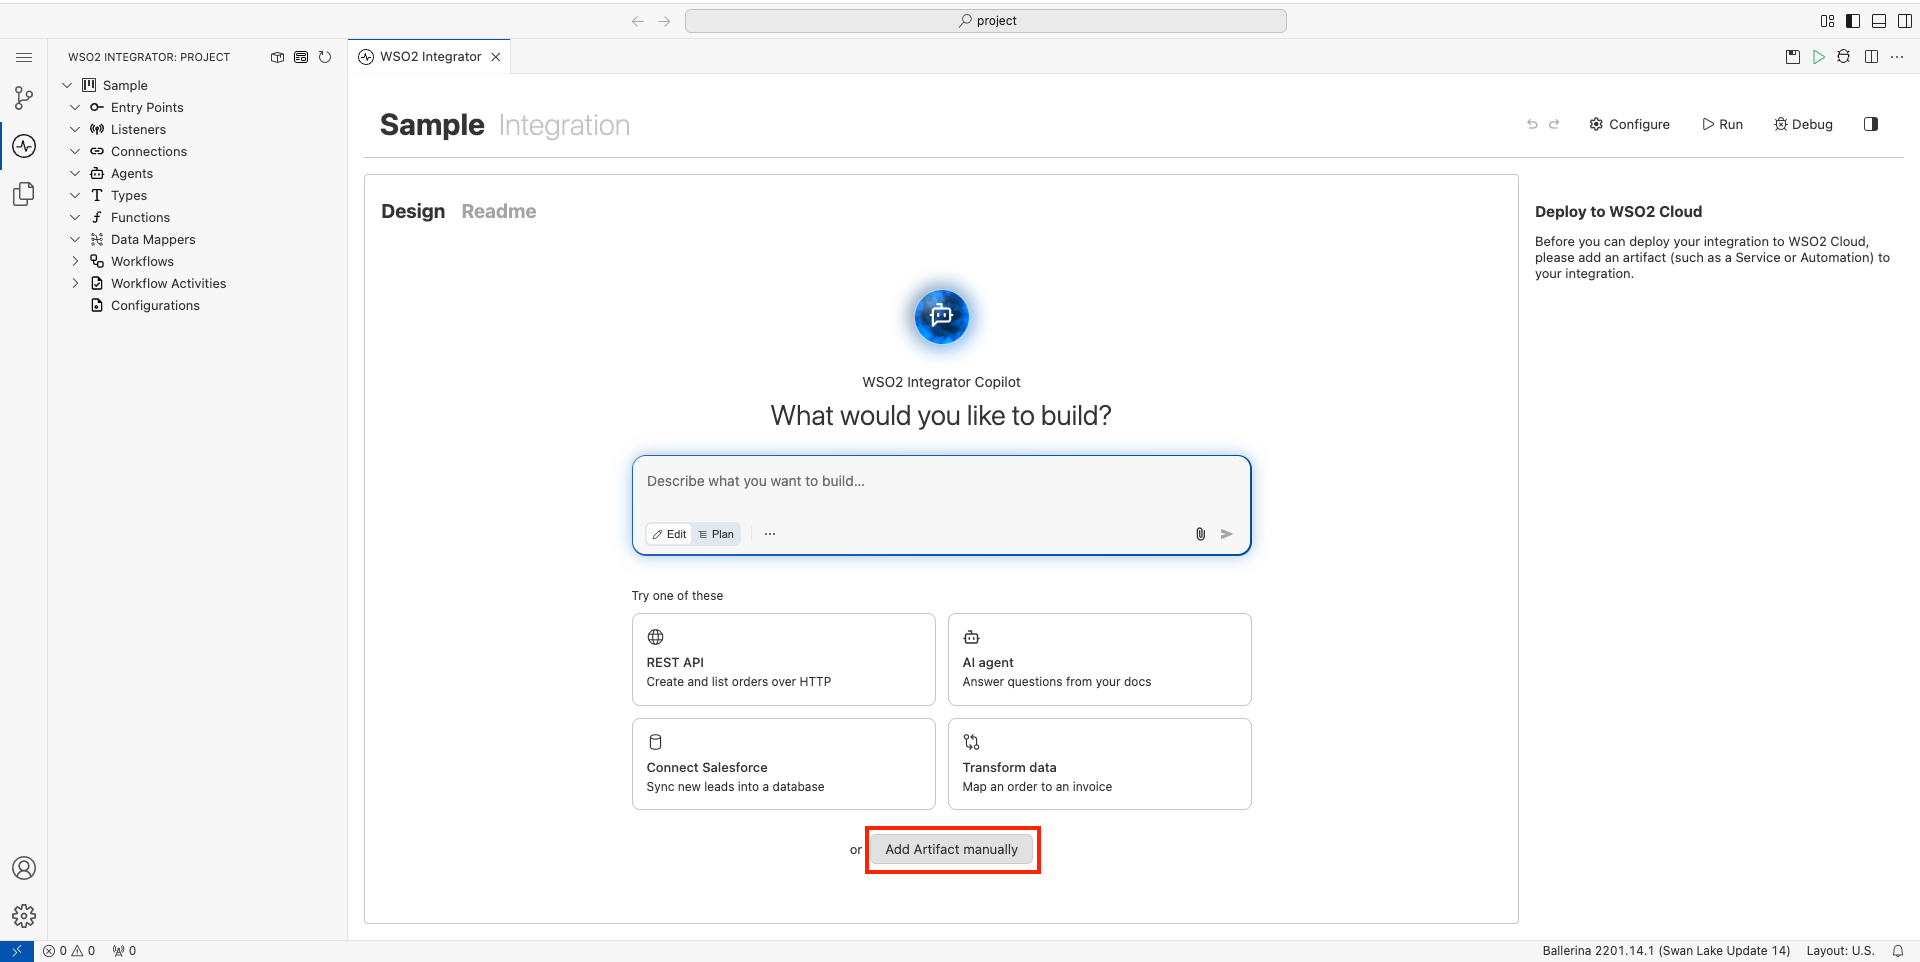
In the design view, click Add Artifact manually.
-
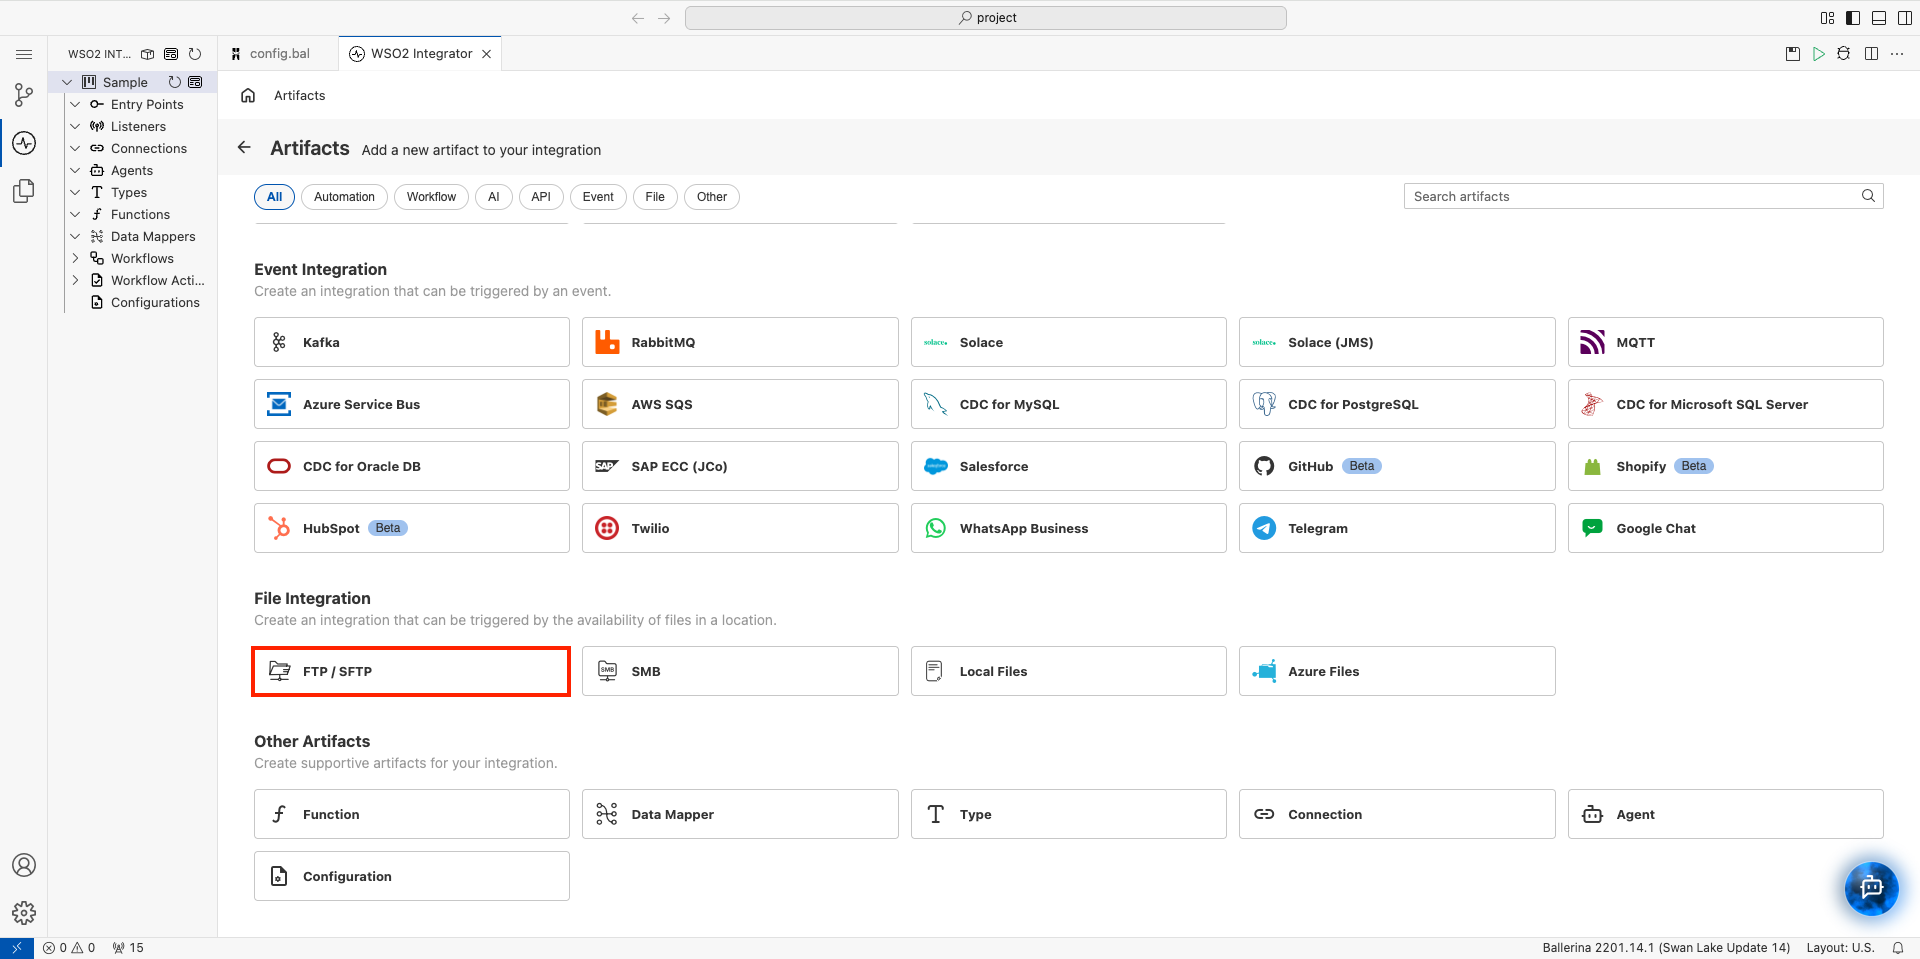
Select FTP / SFTP under File Integration.
-
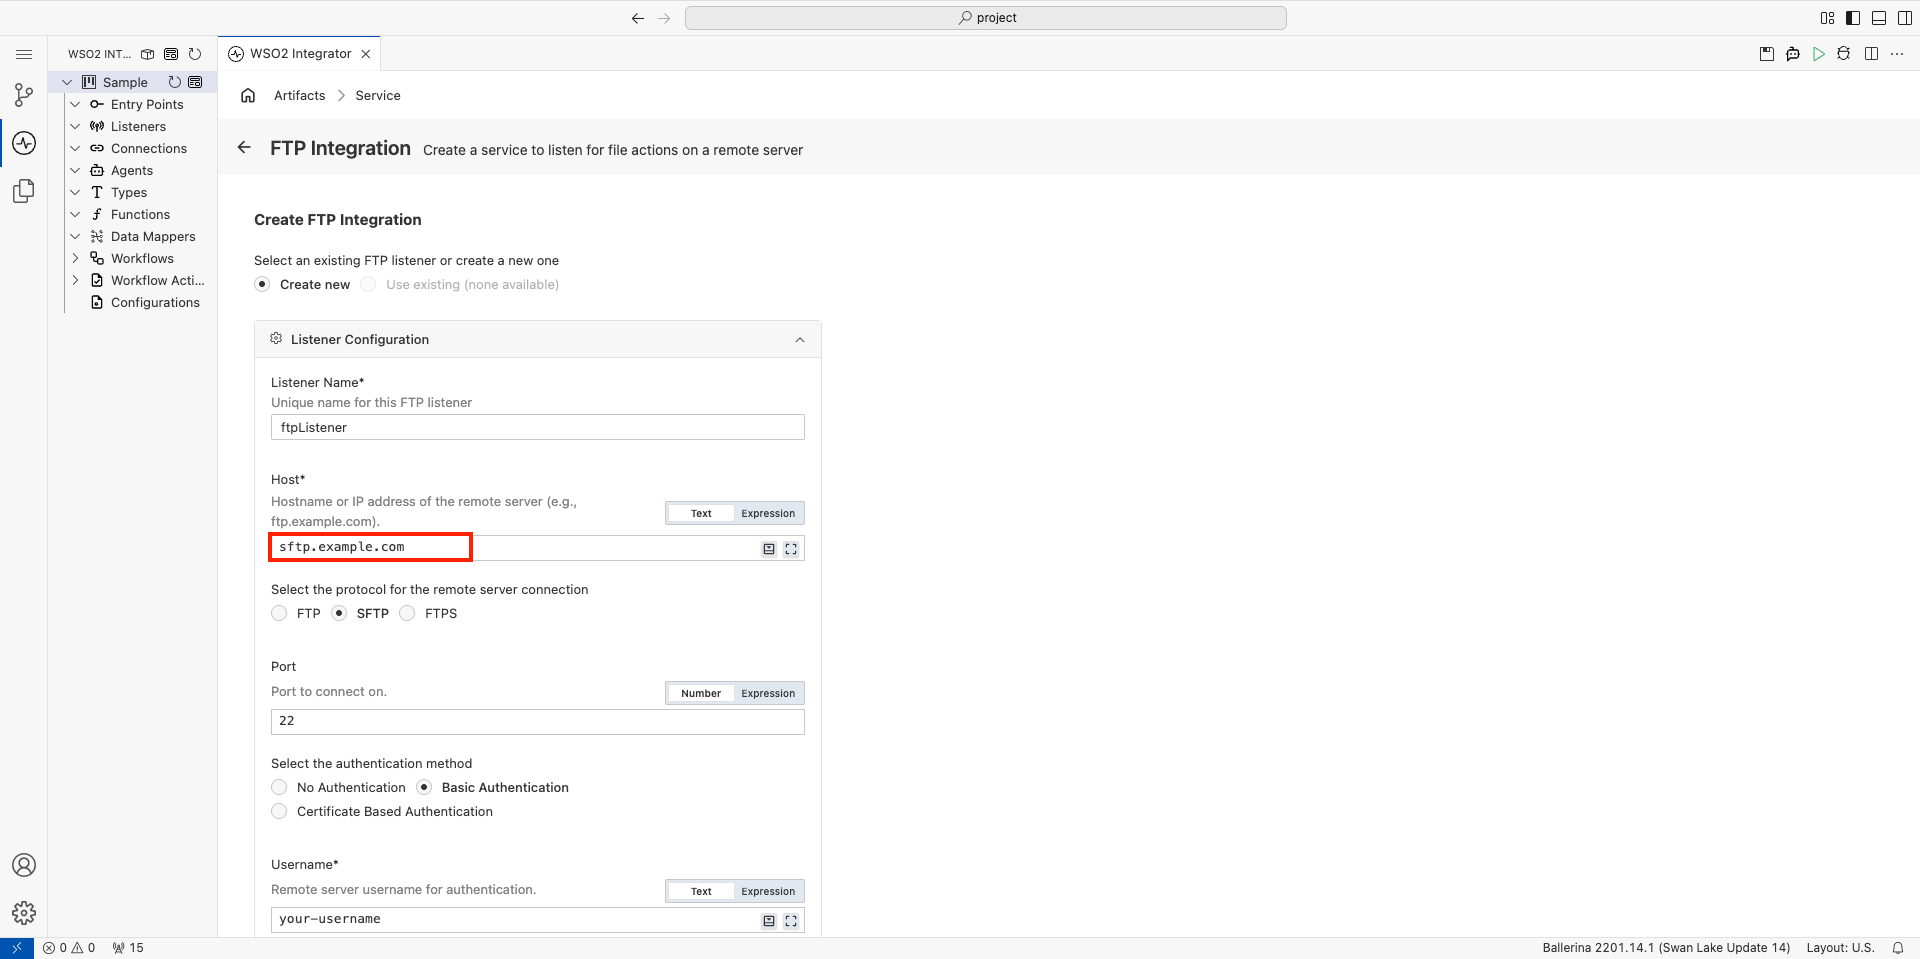
Set Host to your server's host.
-
Select the protocol your server uses: FTP, SFTP, or FTPS.
-
Set Port to your server's port. For example, SFTP usually uses port
22.
-
Select Basic Authentication.
-
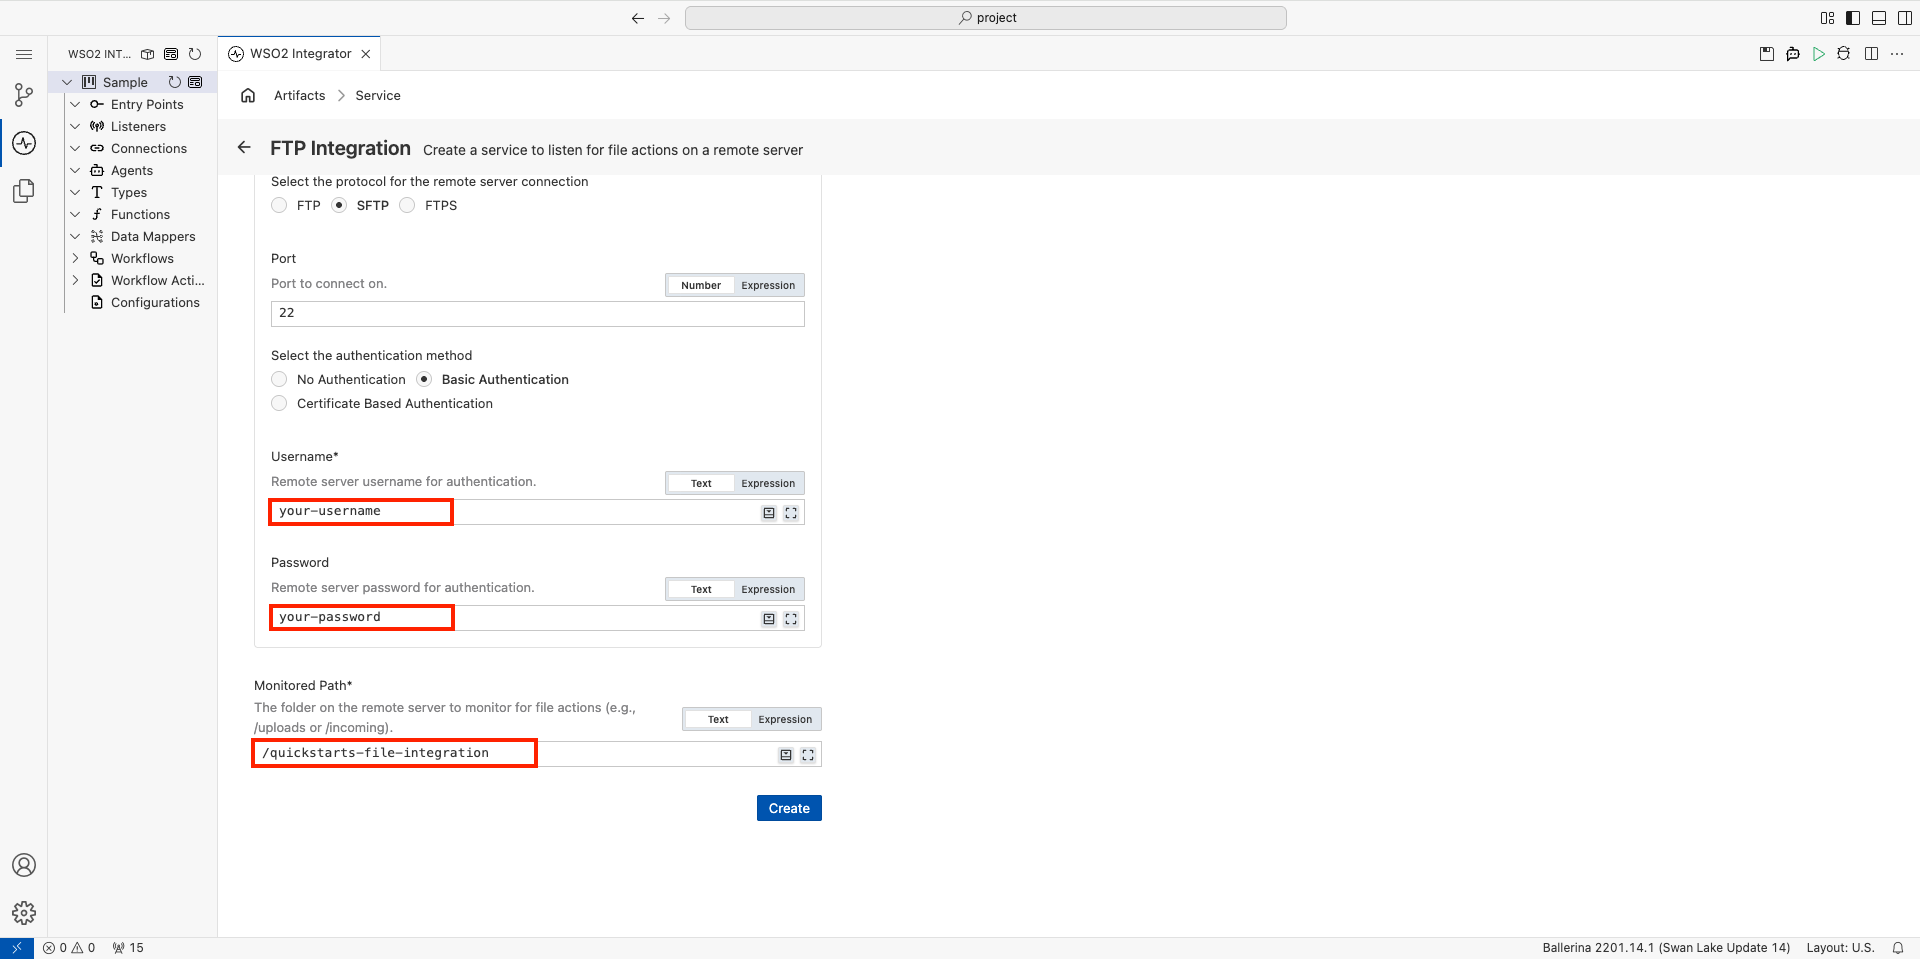
Set Username and Password to your server's username and password.
-
Set Monitored Path to the folder you want to watch, for example
/quickstarts-file-integration. The folder must already exist on the server. -
Click Create.
Step 3: Add onCreate event handler
-
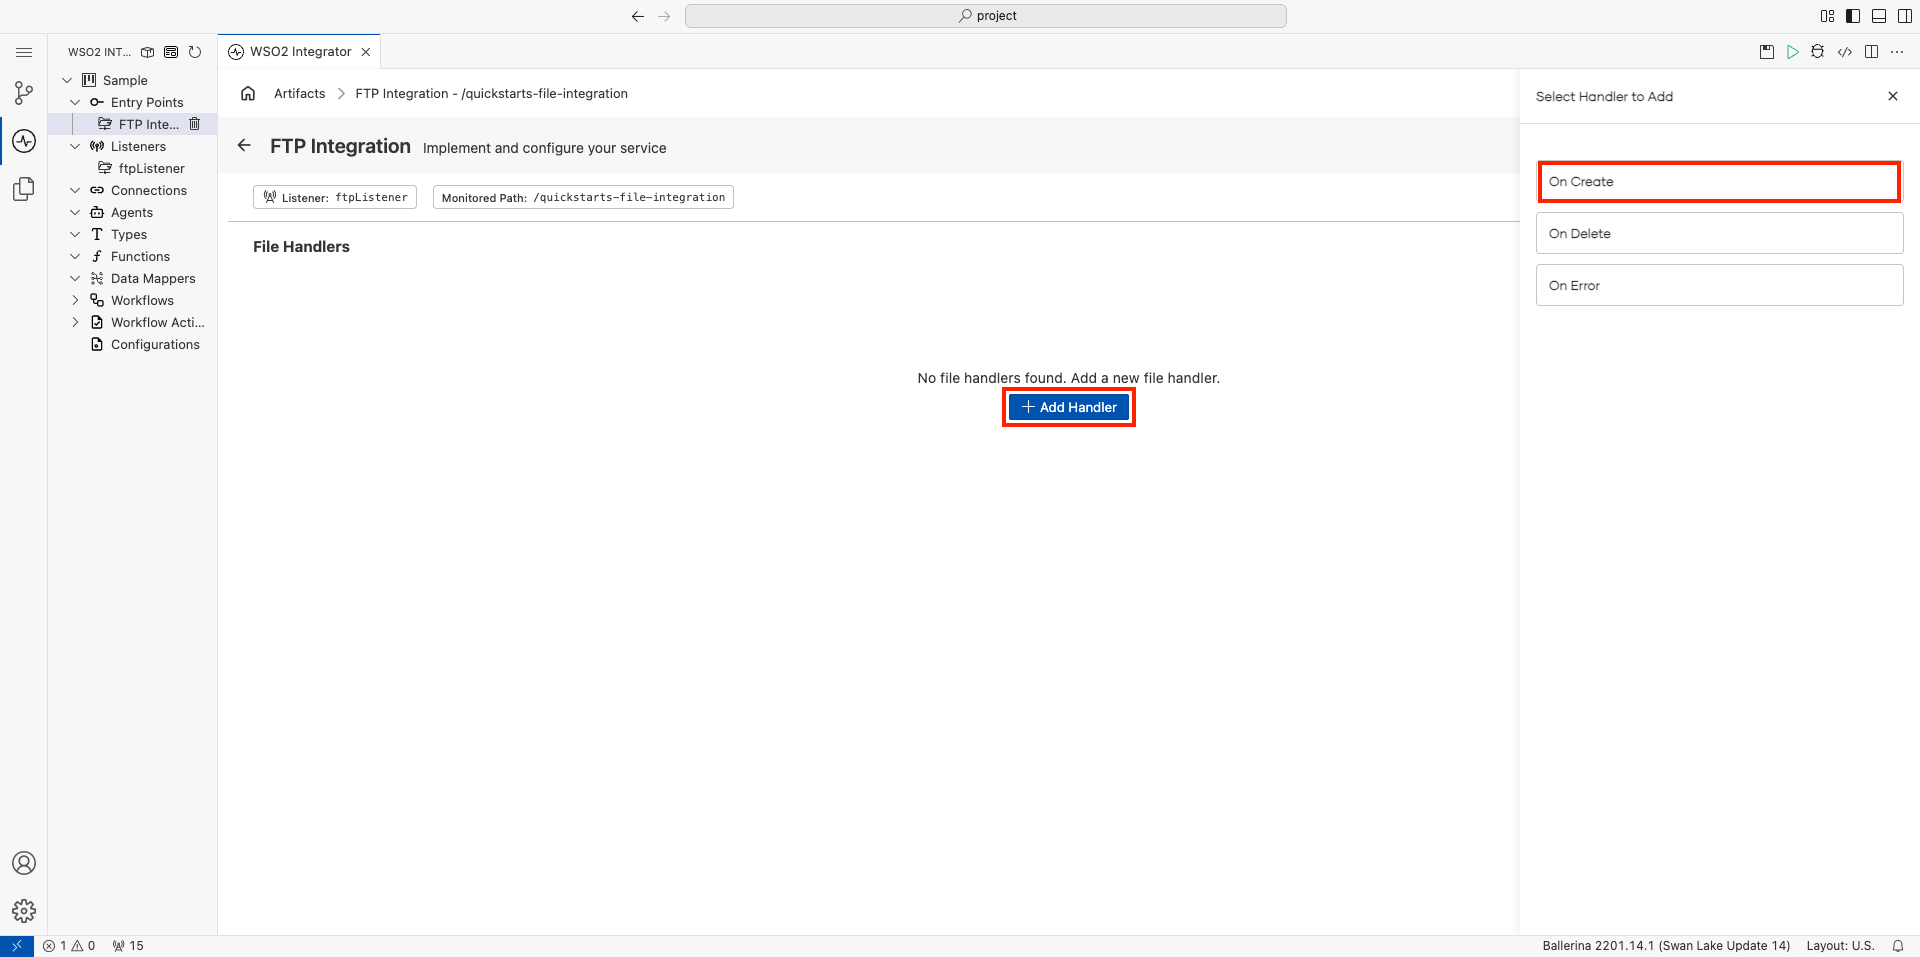
In the FTP Integration design view, click + Add Handler.
-
In the Select Handler to Add panel, select On Create.
-
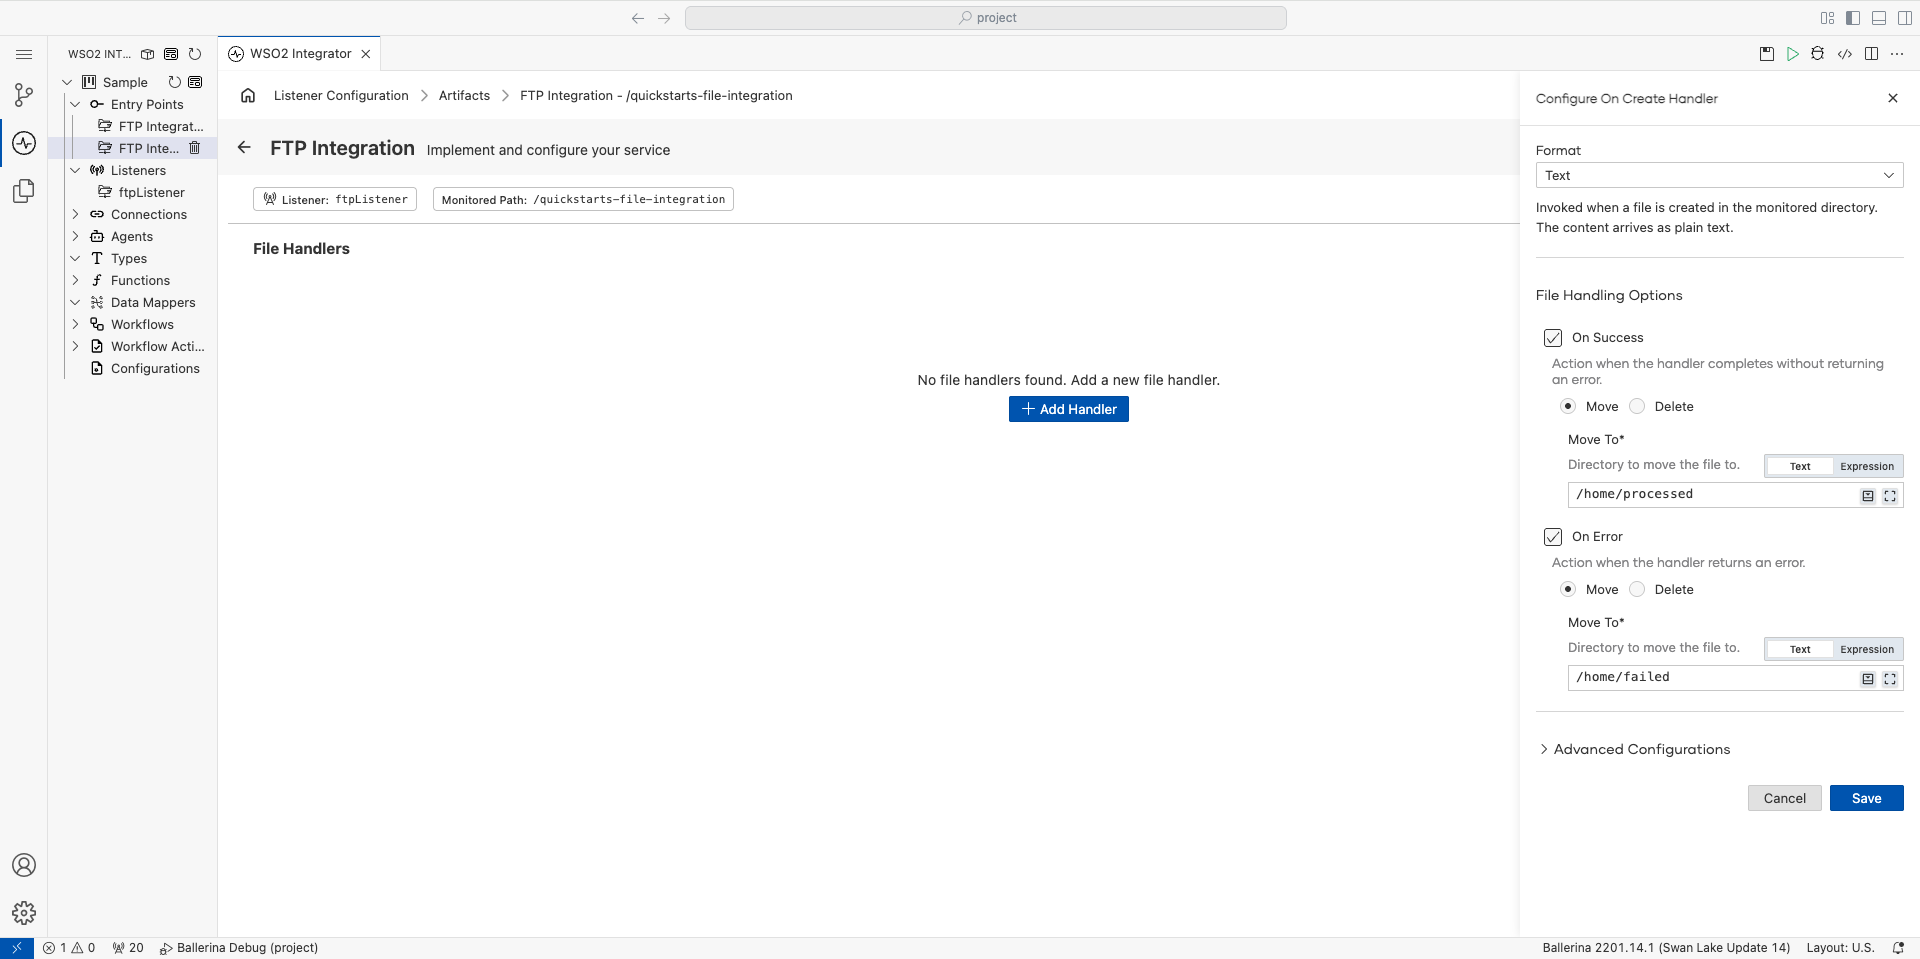
Set Format to Text.
-
Keep the default File Handling Options. After processing a file, the integration moves it to the
/home/processedfolder on your server to prevent it from being processed again. -
Click Save.
Step 4: Add file processing logic
-
Click + inside the
onFileTextflow.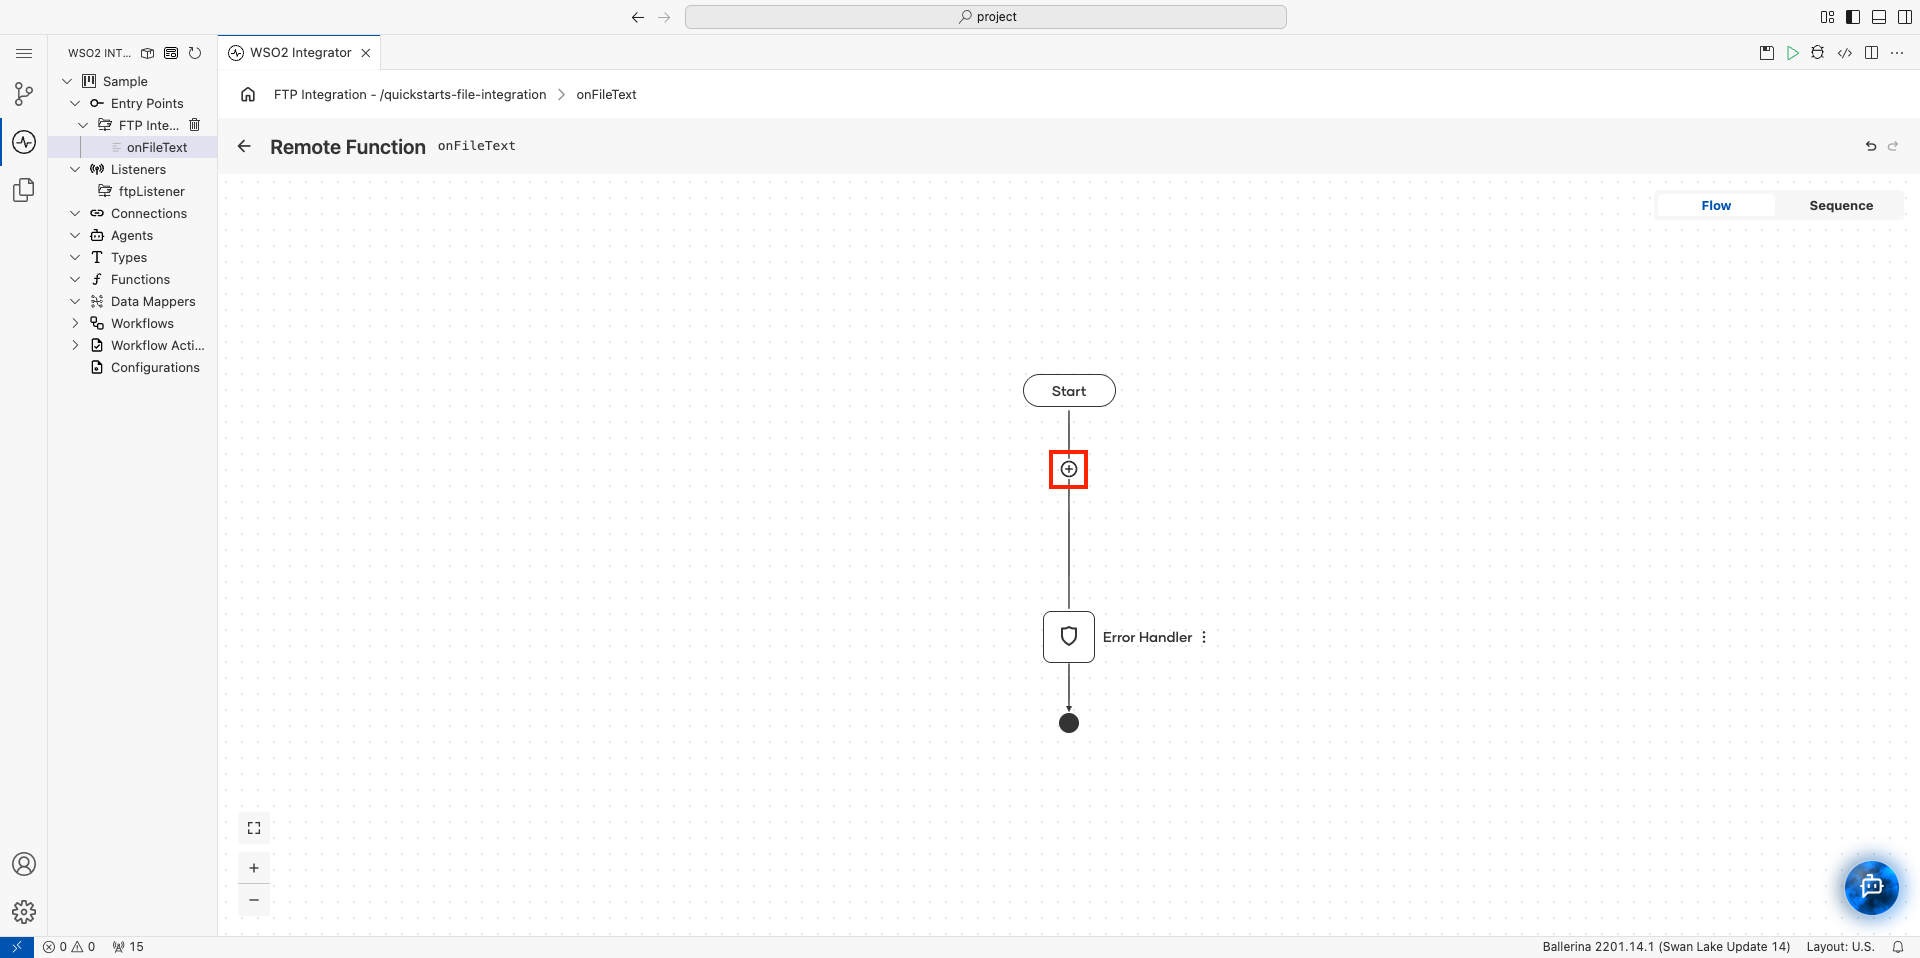
-
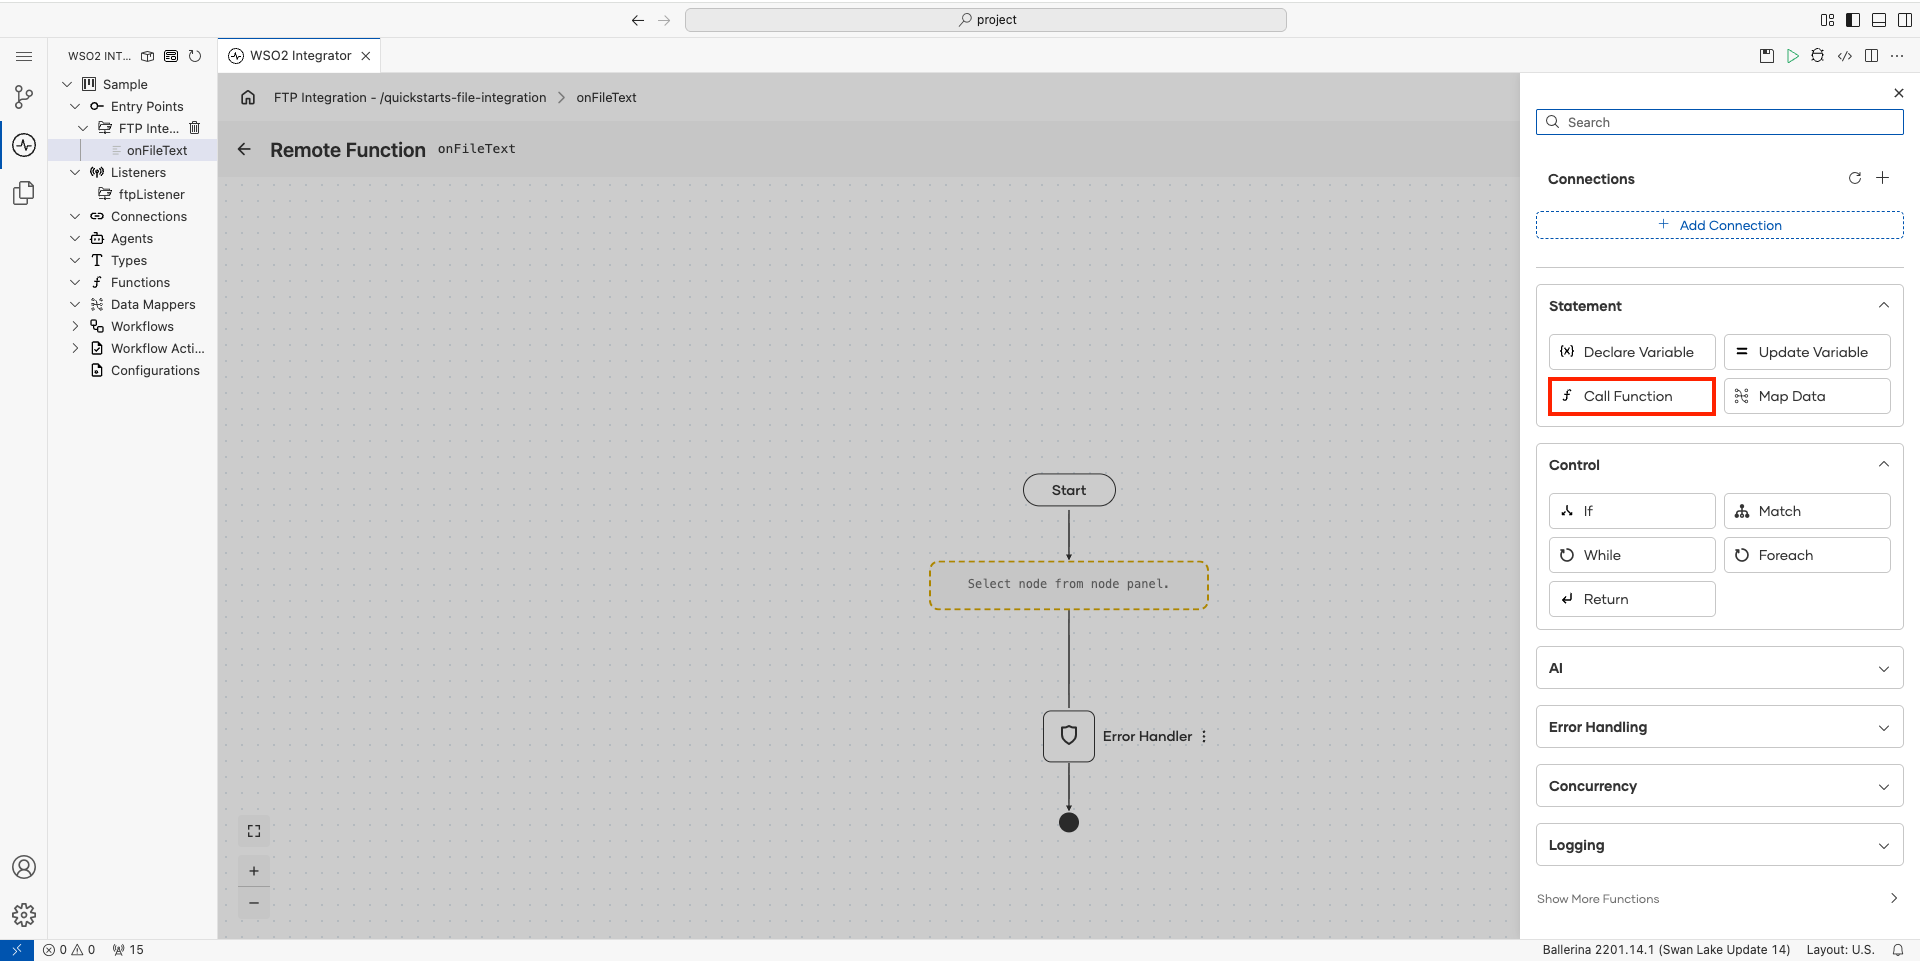
Select Call Function under Statement.
-
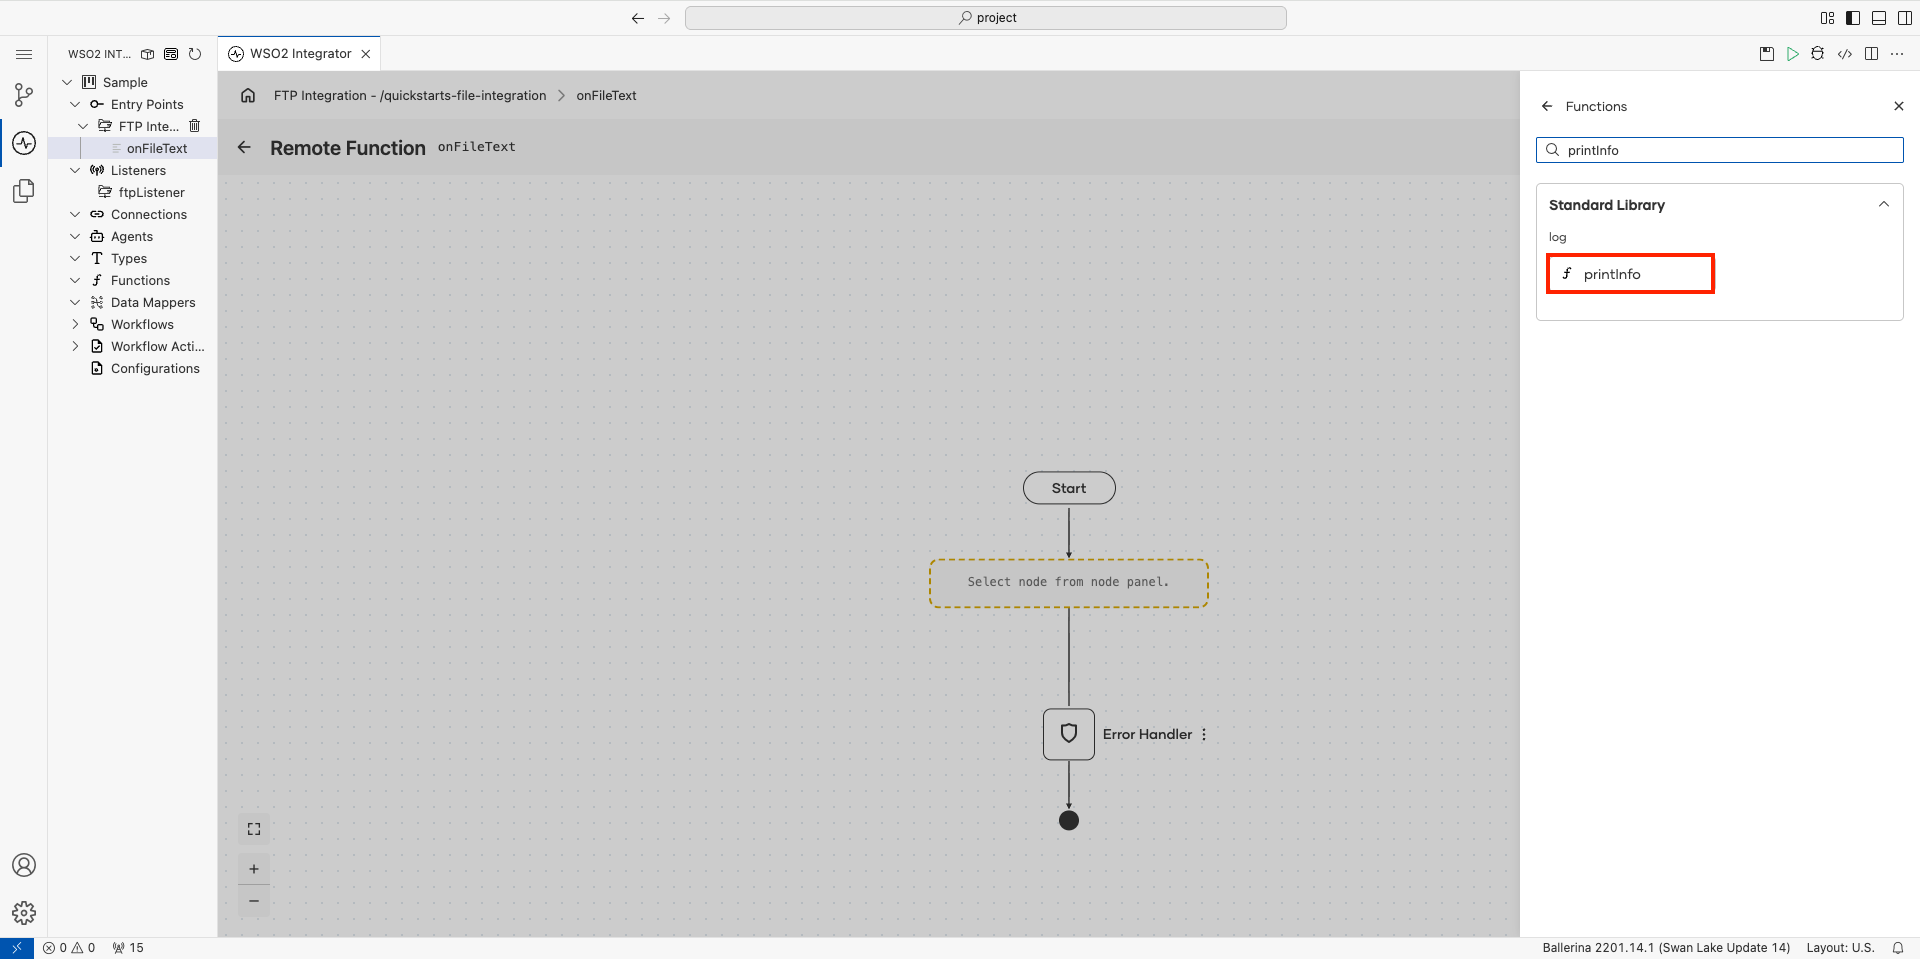
Search for
printInfoin the functions panel. -
In the search results, go to the Standard Library section and select the printInfo function under log.
-
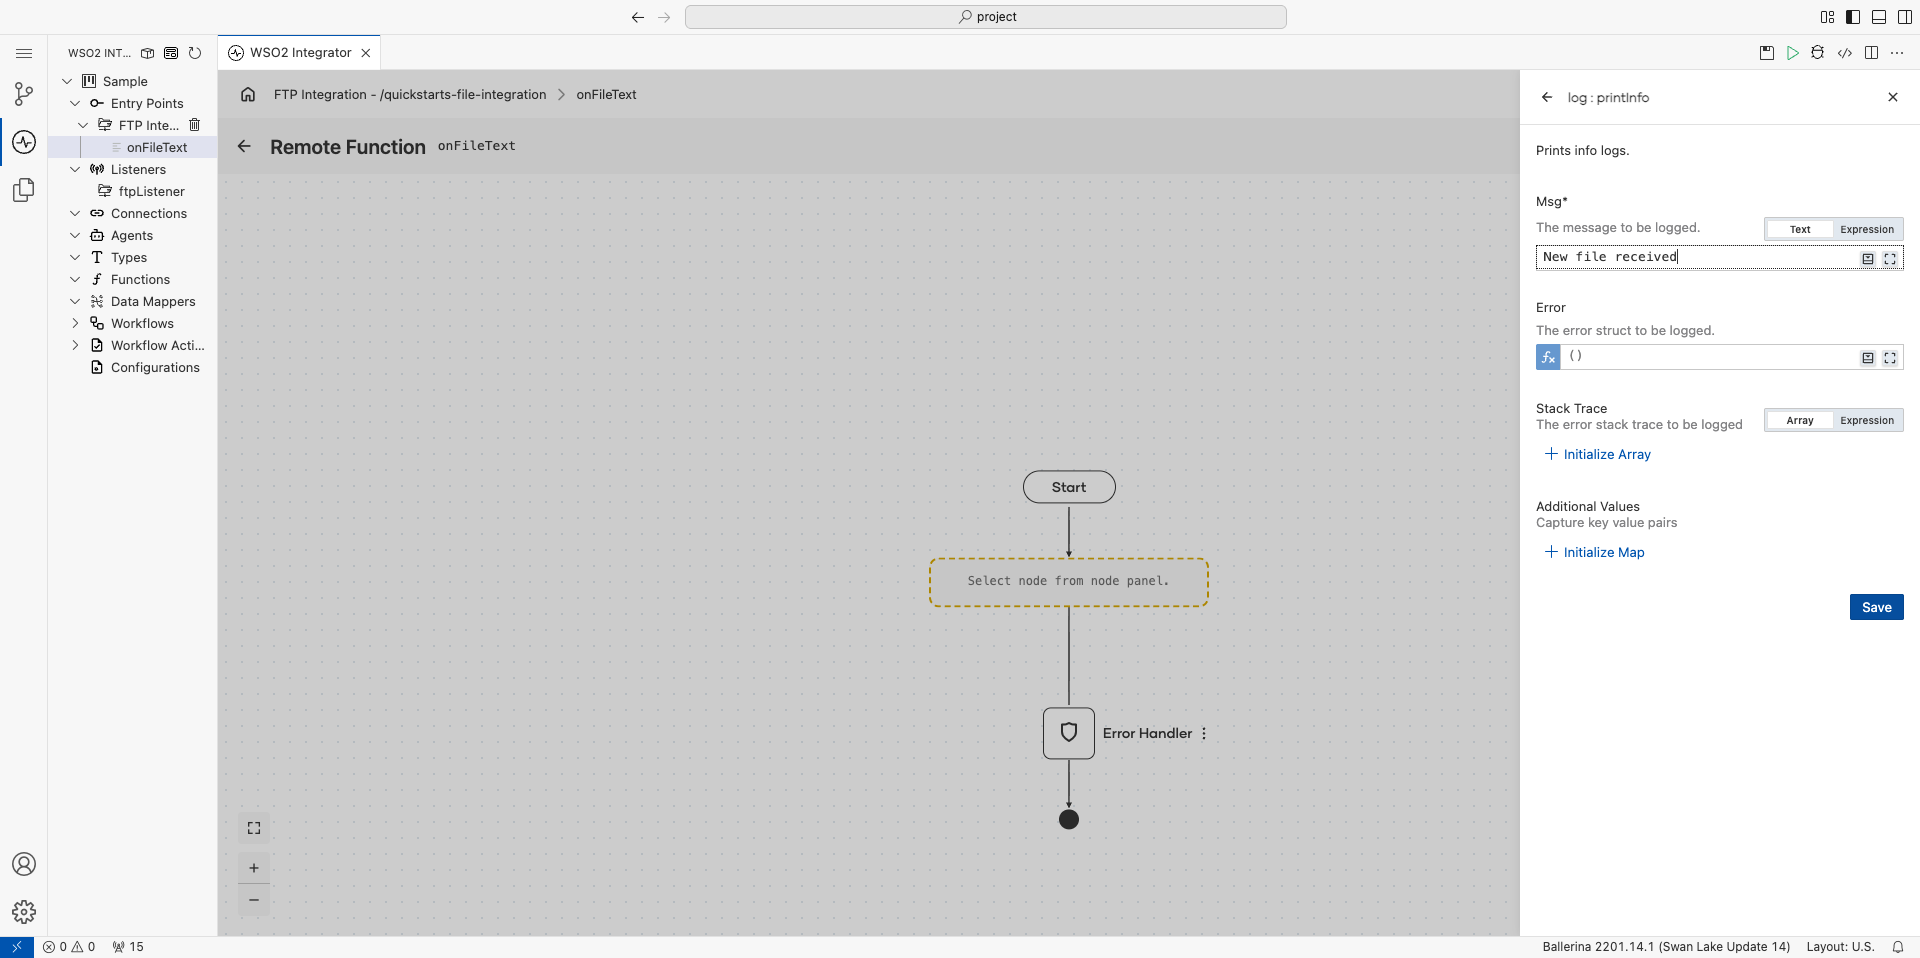
Set Msg to
New file received. -
Click Save.
Step 5: Run and test
-
Click Run. The Debug Console opens at the bottom of the editor. It shows some messages while the integration connects to your server, such as
Authentication succeeded. These messages are expected. -
Using your FTP or SFTP client, upload a text file, such as
test.txt, to the monitored folder. -
Wait up to a minute. The integration checks the folder every 60 seconds by default.
-
Confirm the Debug Console shows a log line that ends with
message="New file received".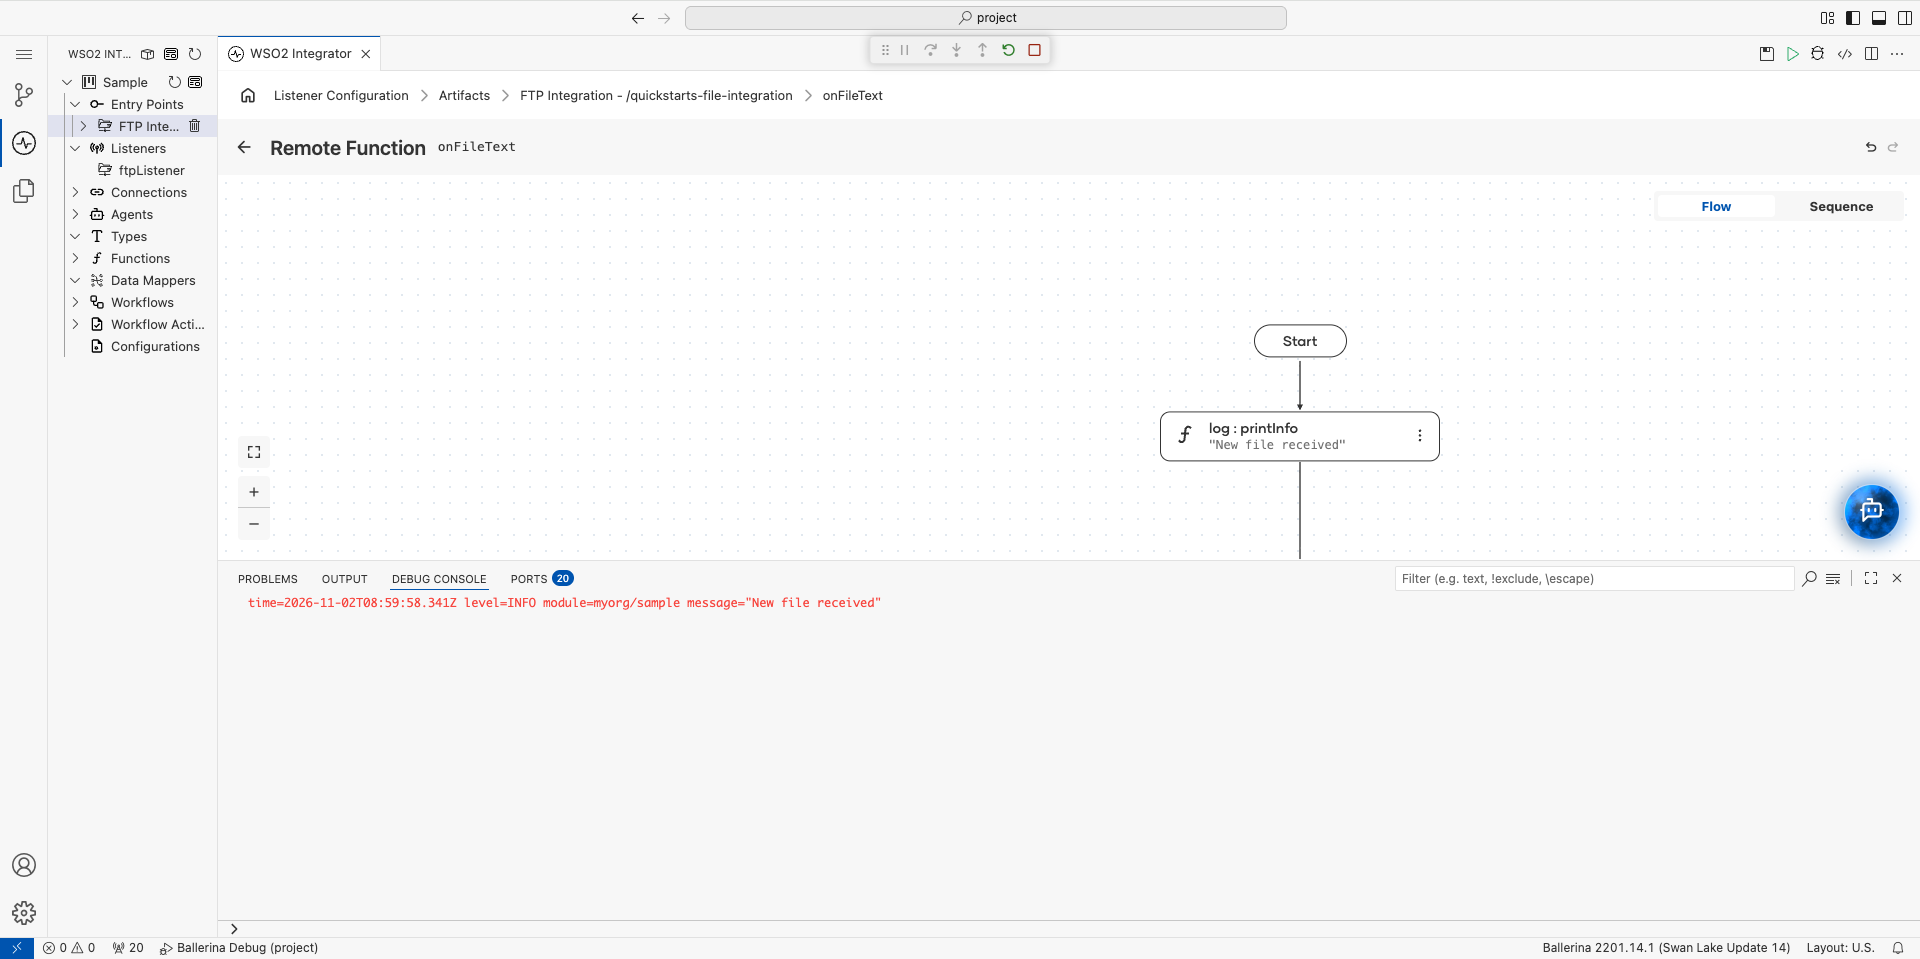
Step 6: Deploy to WSO2 Cloud
To deploy your integration to WSO2 Cloud from the cloud editor, see Save and deploy.
Source code
View the generated Ballerina code
The steps above generate the following complete, runnable Ballerina program:
import ballerina/ftp;
import ballerina/log;

listener ftp:Listener ftpListener = new (host = "<your-server-host>", protocol = ftp:SFTP, port = 22, auth = {credentials: {username: "<your-username>", password: "<your-password>"}});

@ftp:ServiceConfig {path: "/quickstarts-file-integration"}
service ftp:Service on ftpListener {
    @ftp:FunctionConfig {afterProcess: {moveTo: "/home/processed"}, afterError: {moveTo: "/home/failed"}}
    remote function onFileText(string content) returns error? {
        do {
            log:printInfo("New file received");
        } on fail error err {
            // handle error
            return error("unhandled error", err);
        }
    }
}
Learn more
- FTP/SFTP — Watch and process files on remote FTP or SFTP servers
- Local files — Full Local Files listener reference (events, recursive watching, file handlers)
- Streaming large files — Process large files without loading them fully into memory
- CSV fault tolerance — Handle errors and partial failures when processing CSV files